

Mike Lehman
Mastering Beauty Product Photography: A Guide to Stunning Visuals
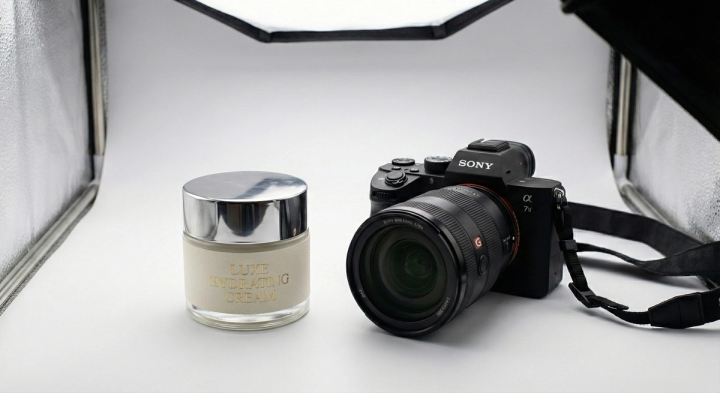
In e-commerce, a picture is worth a thousand sales, especially in beauty. With customers relying on images, high-quality beauty product photography is the cornerstone of a successful online brand and your silent 24/7 salesperson.
This guide covers essential equipment, lighting, composition, and styling. We’ll also explore overcoming common challenges and leveraging AI to streamline your workflow.
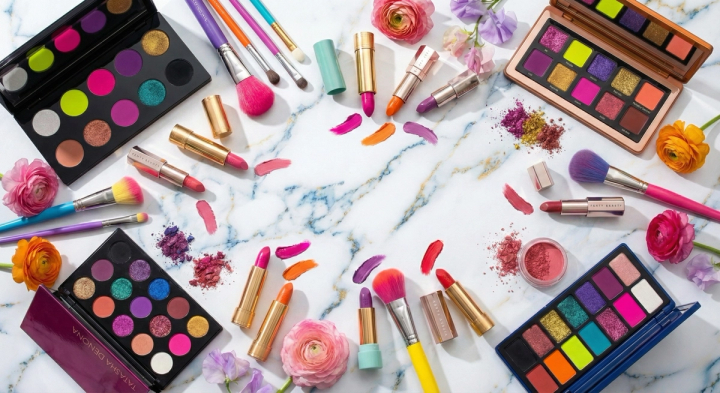
Why High-Quality Images Matter for Beauty Brands
In a digital marketplace, visuals drive engagement and sales. With 93% of consumers citing visual appearance as a key purchasing factor, your product photography is the most critical touchpoint in the customer journey. You can find more statistics on this topic on sites like Statista.
Great images build trust and tell your brand’s story, conveying quality, texture, and color in detail. High-quality visuals can increase conversion rates by up to 30% and reduce returns by 27%. Professional photography sets you apart, turning browsers into loyal customers and boosting sales and brand perception.
Essential Equipment for Beauty Product Photography
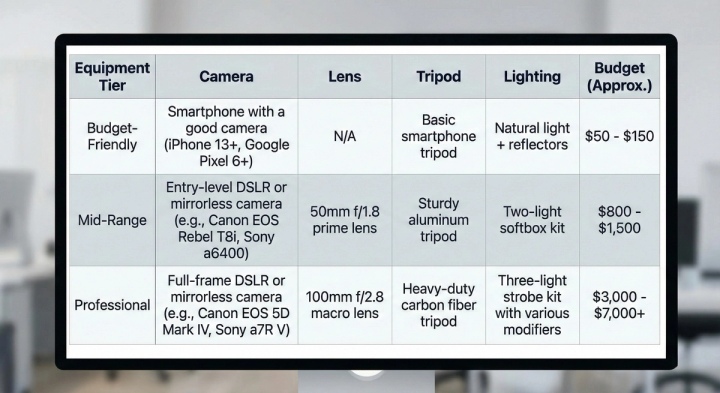
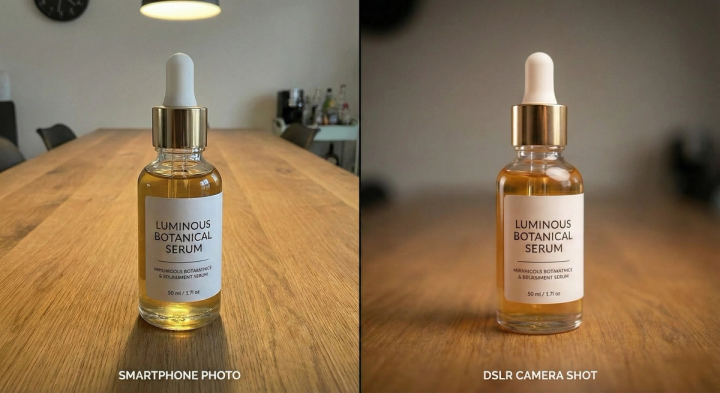
Investing in the right equipment is crucial for quality and consistency, but a massive budget isn’t necessary. For streamlined content creation, AI-powered solutions like Pikes.ai offer a compelling alternative, allowing you to skip the equipment entirely and generate high-quality product photos in minutes.
For the traditional route, here’s a breakdown of essential equipment by budget:
Lighting Techniques for Flawless Beauty Shots
Lighting is the soul of photography, shaping mood, defining texture, and bringing products to life. In beauty product photography, the right lighting makes a product irresistible. Mastering light is a non-negotiable skill.
Natural Light
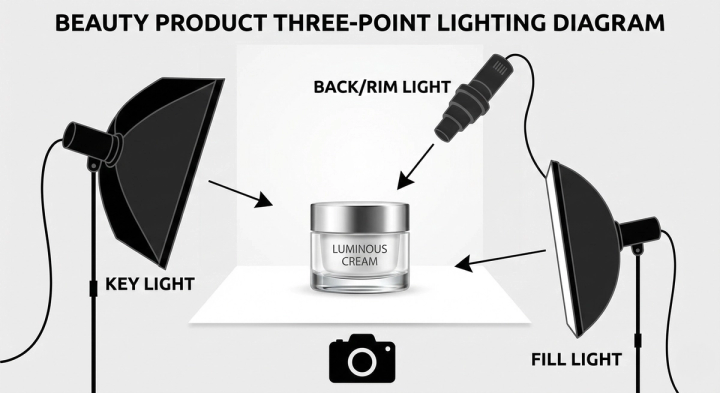
Natural light is a great starting point for beginners. It’s free and creates a soft, flattering look. The best time to shoot is during the “golden hours” (the first hour after sunrise and the last hour before sunset). Position your setup near a large window and use a white reflector to fill in shadows.
Artificial Light
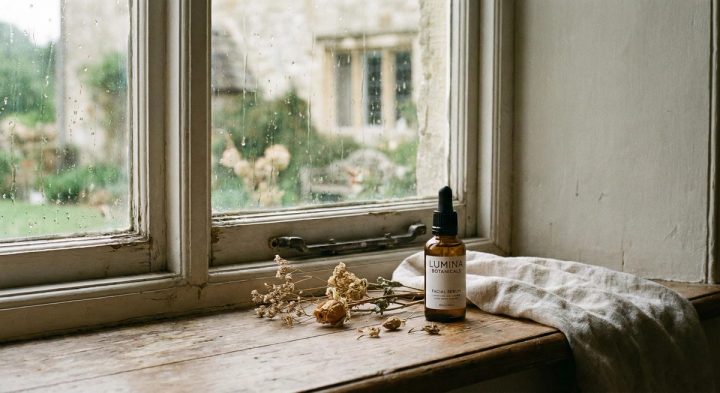
Artificial lighting gives you complete control and consistency. The most common types are continuous lights (LED panels) and strobes (flash units).
- Key Light: Your main light source, positioned to one side of the product.
- Fill Light: A secondary light placed on the opposite side to soften shadows.
- Backlight: Placed behind the product to create separation from the background and add a subtle glow.
Common Lighting Mistakes to Avoid
- Harsh Shadows: Caused by direct, unfiltered light. Always use a diffuser, like a softbox, to soften your light source.
- Inconsistent White Balance: Ensure your camera’s white balance is set correctly to avoid color casts.
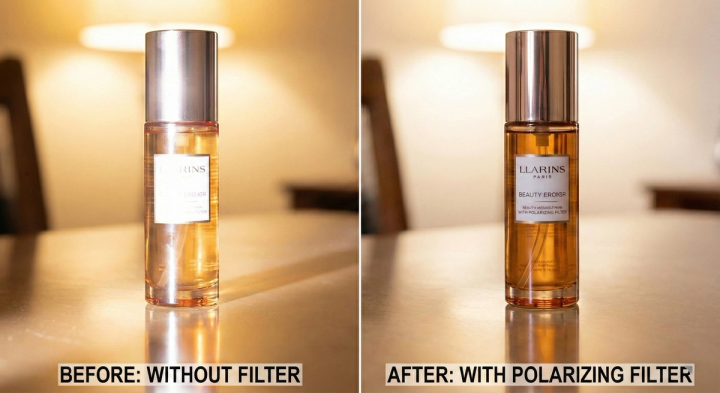
- Glare and Reflections: Use a polarizing filter or adjust your light position to minimize distracting reflections on shiny surfaces.
For more in-depth guidance on lighting setups, check out this comprehensive guide from Shopify’s blog.
Backgrounds and Props: Setting the Scene
Backgrounds and props are as important as the product, providing context and enhancing features without distraction.
Choosing the Right Background
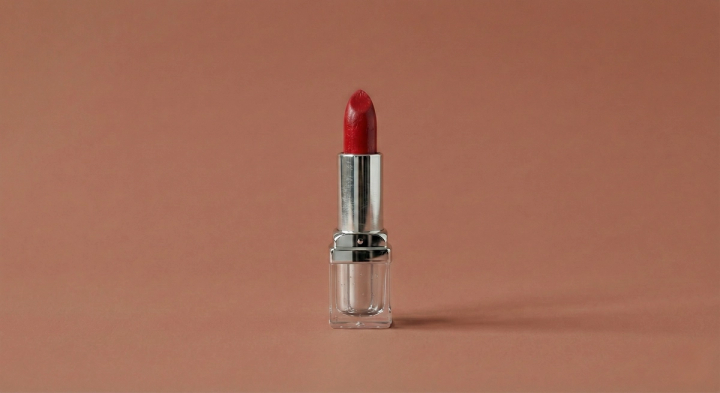
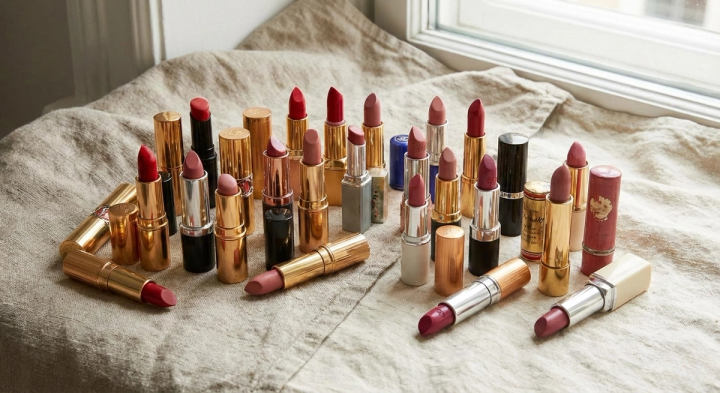
Simple, clean backgrounds like white, gray, or pastels work best for beauty products. Use seamless paper, vinyl backdrops, or foam board. For a lifestyle feel, use natural textures like marble, wood, or linen that align with your brand’s aesthetic.
Scaling with AI
Creating varied backgrounds is time-consuming and expensive. AI tools are a game-changer. With a platform like Pikes.ai, you can scale your backgrounds with AI, generating endless scenes and environments without a physical setup. This creates diverse and engaging content for different marketing channels.
Using Props Effectively
Props should add to the story, not complicate it. For beauty products, use ingredients (lavender, citrus), water drops for hydration, or textured fabrics for luxury. Less is more.
Composition and Styling Tips
Composition is arranging elements to create a balanced, visually appealing image that guides the viewer’s eye and highlights key product features.
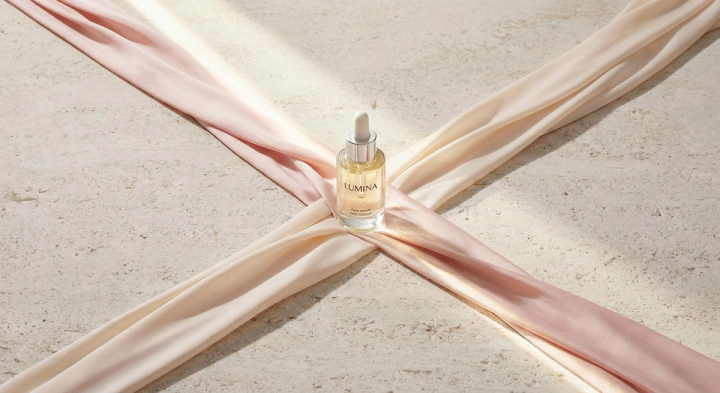
- The Rule of Thirds: Imagine your frame is divided into a 3x3 grid. Place your product at the intersection of these lines to create a more dynamic composition.
- Leading Lines: Use lines within your scene (like the edge of a counter or a swirl of cream) to lead the viewer’s eye directly to the product.
- Negative Space: Don’t be afraid to leave empty space around your product. This can create a sense of elegance and sophistication.
- Group Shots: When photographing multiple products, arrange them in a way that feels natural and uncluttered. Try creating triangles or S-curves with your arrangement.

Styling is about the details. Ensure your products are pristine: clean, fingerprint-free, and with perfectly aligned labels. For more inspiration, explore The Dropshipper’s Guide to Creating Highly Converting Product Visuals with AI.
Camera Settings for Crisp and Clear Shots
Nailing camera settings is essential for professional-quality images. While settings vary, here’s a general starting point for beauty product photography.
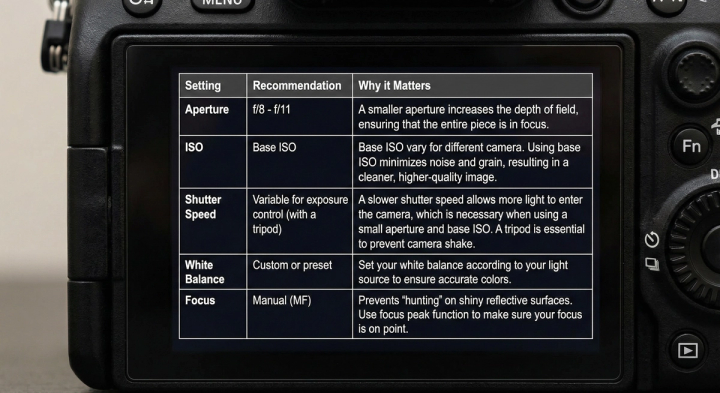
Always shoot in RAW format if your camera allows it. This captures the most data and gives you greater flexibility in post-production.
Overcoming Common Beauty Photography Challenges
Beauty product photography has unique challenges. Here’s how to tackle them.

- Shooting Reflective Surfaces: Products in shiny packaging can be a nightmare to photograph due to glare. Use large, diffused light sources and experiment with black and white cards (known as “flags” and “bounces”) around the product to control reflections.
- Capturing Accurate Colors: Color is everything in beauty. Use a grey card or a color checker to set a custom white balance and ensure your colors are true-to-life. This small step can save you hours of frustration in editing.
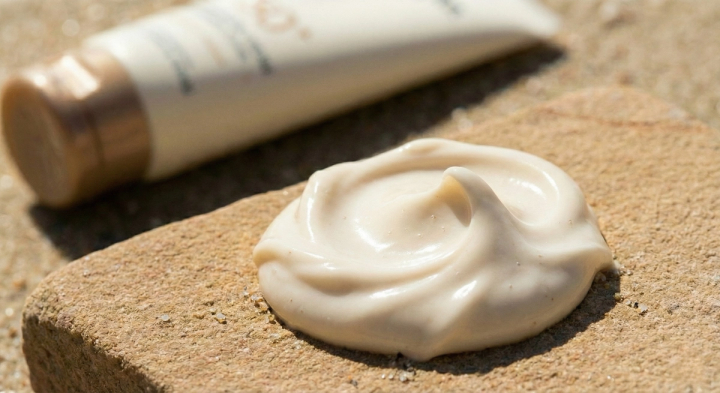
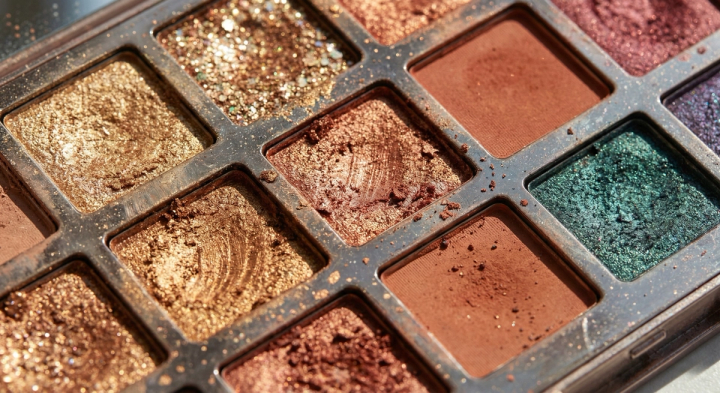
- Showing Texture: For products like eyeshadows, highlighters, and creams, texture is a key selling point. Use hard, direct light from the side (a technique called “raking light”) to emphasize texture and dimension.
- Scaling Content: Creating a high volume of unique images for different platforms and campaigns can be a major bottleneck. This is where leveraging AI becomes a powerful strategy. For brands looking to scale, the challenge of producing endless visual variations is a solvable one with tools like Pikes.ai, which can generate a vast library of images from a single product shot.
Post-Production and Editing Workflow
Editing is the final polish that transforms a good photo into a great one, and a consistent workflow ensures cohesive, professional images.
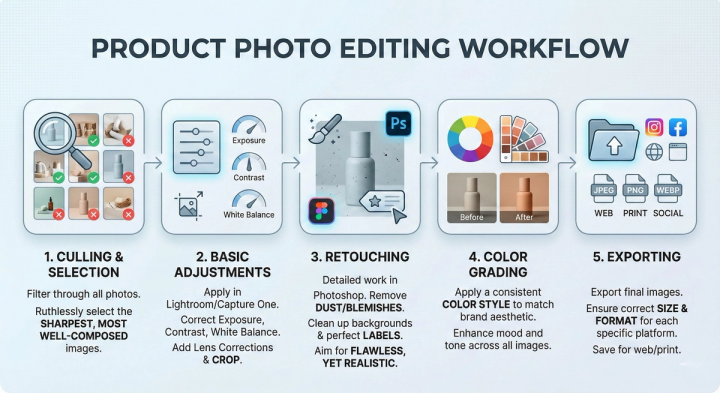
- Culling and Selection: The first step is to go through your photos and select the best ones. Be ruthless—only choose the sharpest, most well-composed images.
- Basic Adjustments: In an editor like Adobe Lightroom or Capture One, make basic adjustments to exposure, contrast, and white balance. Apply lens corrections and crop if necessary.
- Retouching: In a program like Adobe Photoshop, it’s time for detailed retouching. This includes removing dust and blemishes, cleaning up backgrounds, and perfecting product labels. The goal is to make the product look its absolute best without appearing unrealistic.
- Color Grading: This is where you apply a consistent color style to your images to match your brand’s aesthetic.
- Exporting: Export your final images in the correct size and format for each platform.
Skip the Editing Queue
For many brands, the post-production process is a significant time sink. Instead of spending hours retouching photos or waiting for an editor, you can skip the editing queue entirely. AI platforms like Pikes.ai automate the entire process, from background removal to color correction, delivering ready-to-use images in seconds.
Platform-Specific Requirements
Different platforms have specific image requirements. Optimizing for each is crucial for visibility and engagement. Here’s a quick guide.
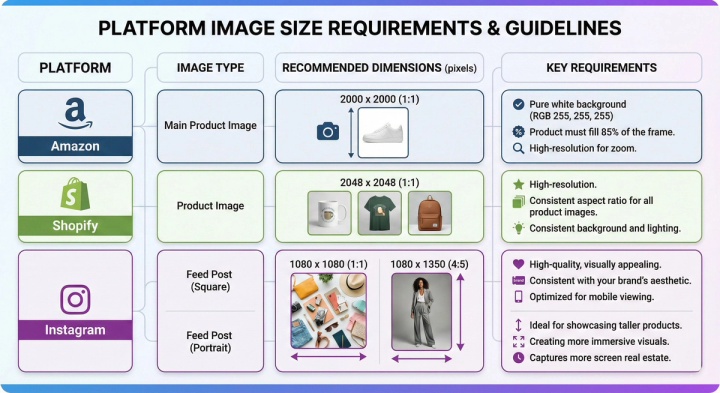
For a comprehensive and always up-to-date guide on social media image sizes, refer to resources like this one from Sprout Social.
How AI is Transforming Beauty Product Photography
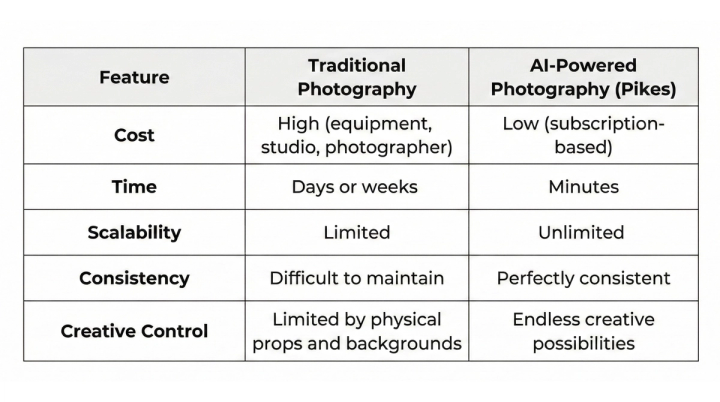
AI is revolutionizing visual content creation. AI-powered photography platforms make high-quality product photography faster, more affordable, and infinitely more scalable, opening up creative possibilities for beauty brands.
With a platform like Pikes.ai, you can upload a single product image and generate thousands of unique, on-brand visuals in minutes. Create custom content for every marketing channel, A/B test different backgrounds and styles, and keep your visual content fresh without expensive photoshoots.
Here’s a comparison of traditional photography versus an AI-powered workflow:
Conclusion
Beauty e-commerce, your product photography is your most powerful selling tool. High-quality visuals build your brand, foster trust, and drive sales. The journey to stunning product photography is both an art and a science, from mastering your camera to embracing AI.
Whether you choose traditional photography or an AI-powered platform like Pikes.ai, the principles of good photography remain: light, composition, and attention to detail. By embracing the power of AI with Pikes.ai, you can create captivating images that stop the scroll and convert browsers into lifelong customers.
FAQ
1. What is the most important element in beauty product photography? While all elements are important, lighting is arguably the most critical. It sets the mood, defines the shape and texture of the product, and is the key to a professional-looking image.
2. Can I take good product photos with my smartphone? Absolutely! Modern smartphones have incredibly capable cameras. When combined with good lighting, a stable tripod, and a strong understanding of composition, you can capture stunning product photos with your phone.
3. How can I ensure my product colors are accurate? Use a grey card or a color checker to set a custom white balance on your camera. This will give you a neutral reference point and ensure your colors are true-to-life, which is especially important for products like foundation and lipstick.
4. How many images should I have for each product? Aim for at least 5-7 images per product. This should include a hero shot on a white background, several lifestyle shots showing the product in use or in a styled scene, a close-up of the texture, and an image of the packaging.
5. How can AI help me with my product photography? AI-powered platforms like Pikes.ai can dramatically speed up your workflow and reduce costs. You can generate thousands of unique, on-brand images from a single product photo, create endless background variations, and automate the editing process, allowing you to scale your visual content effortlessly.

Written by
Mike Lehman
Mike Lehman is a senior content strategist at Pikes. Before joining Pikes, Mike spent nearly a decade working with Glossier, Haus, and Athletic Brewing, leading campaigns that blended storytelling and data.