

Mike Lehman
Skincare Photography: A Complete Guide for E-commerce Brands
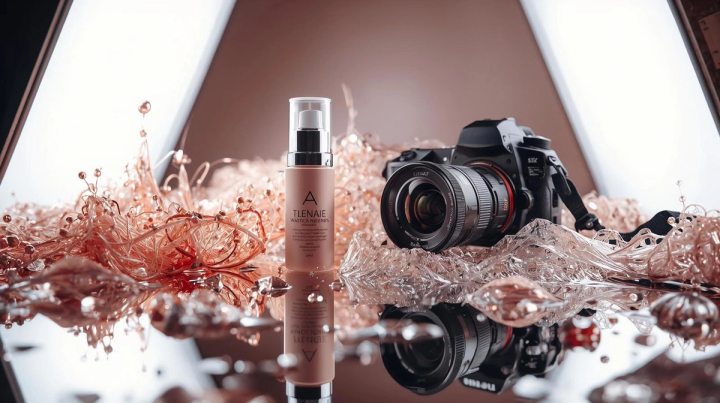
In the hyper-visual world of e-commerce, high-quality imagery is not just a recommendation—it’s a necessity. This is especially true for the skincare industry, where customers rely on visual cues to gauge a product’s texture, efficacy, and overall appeal. Skincare photography is the art of capturing products in a way that is both informative and aspirational, creating a connection with the consumer that goes beyond a simple transaction. This guide will walk you through everything you need to know to create stunning skincare photography, from the essential equipment and lighting techniques to post-production and the revolutionary impact of AI.
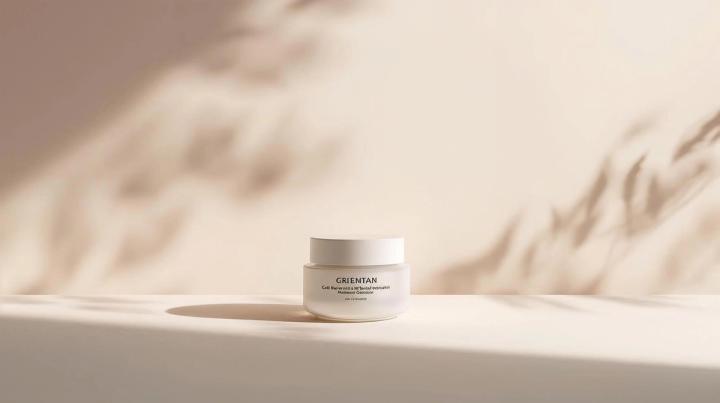
Why High-Quality Images Matter for Skincare Brands
In the digital marketplace, your product images are your storefront. For skincare brands, the stakes are even higher. Customers can’t touch, feel, or smell the products, so they rely on images to make purchasing decisions. High-quality skincare photography can significantly impact your brand’s success in several ways:
- Builds Trust and Credibility: Professional images signal a professional brand. They show that you care about your products and your customers’ experience.
- Communicates Product Details: Close-up shots can highlight a serum’s viscosity, a cream’s texture, or the fine mist of a facial spray. These details help customers understand what they’re buying.
- Increases Conversion Rates: A study by Etsy found that 90% of shoppers said image quality was “very important” to a purchase decision. Compelling images can be the deciding factor between a sale and a bounce.
- Enhances Brand Storytelling: Your images are a powerful tool for conveying your brand’s identity. Whether you’re a minimalist, clinical brand or a vibrant, botanical one, your photography should reflect that.
Essential Equipment
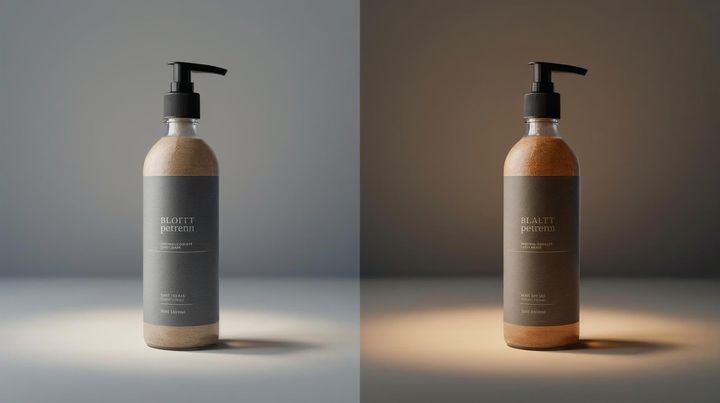
While you don’t need a Hollywood-level studio to create beautiful skincare photography, investing in some key pieces of equipment will make a significant difference in the quality of your images. Here’s a breakdown of essential gear, with options for different budgets. Or, you can skip the equipment entirely with AI-powered solutions like Pikes.
Lighting Techniques
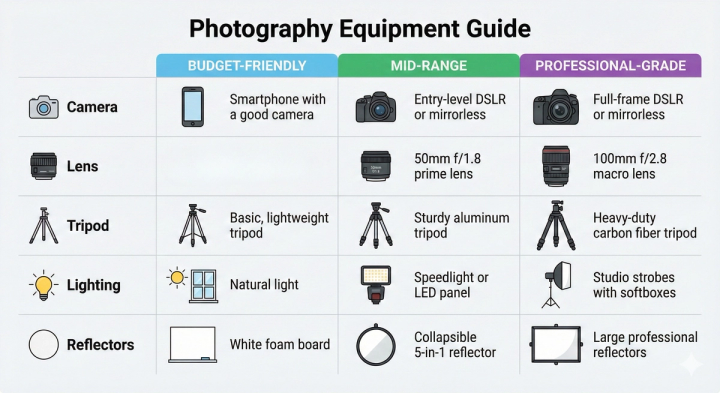
Lighting is arguably the most critical element in skincare photography. It sets the mood, defines the shape and texture of the product, and can make the difference between a flat, unappealing image and a vibrant, enticing one.
Natural Light
Natural light is a fantastic, free resource for creating soft, beautiful images. Position your setup near a large window on an overcast day for diffused, even light. Avoid direct sunlight, which can create harsh shadows and blow out highlights.
- Pro Tip: Use a white foam board or reflector to bounce light back onto your product, filling in any shadows and creating a more balanced exposure.
Artificial Light
For more control and consistency, artificial lighting is the way to go. A two-light setup is a great starting point for most product photography.
- Key Light: This is your main light source, positioned to one side of the product to create dimension and shape.
- Fill Light: Placed on the opposite side of the key light, the fill light softens shadows and reveals more detail.
Common Lighting Mistakes to Avoid
- Harsh Shadows: Caused by a single, direct light source. Use diffusers or reflectors to soften the light.
- Mixed Lighting: Avoid mixing different types of light (e.g., natural light and incandescent bulbs) as it can create a confusing color cast.
- Under- or Overexposure: Keep an eye on your camera’s histogram to ensure you’re capturing a balanced exposure.
Backgrounds and Props
Your choice of background and props can elevate your skincare photography from a simple product shot to a compelling lifestyle image. The key is to choose elements that complement the product and reinforce your brand identity.
Backgrounds
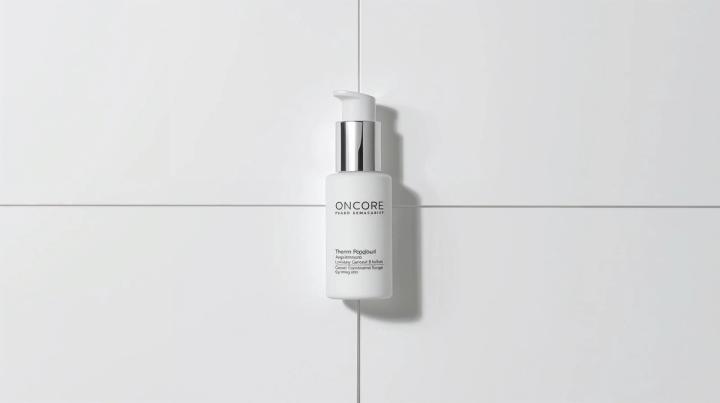
- Seamless Paper: A roll of seamless paper in a neutral color (white, grey, or a soft pastel) is a versatile and professional-looking option.
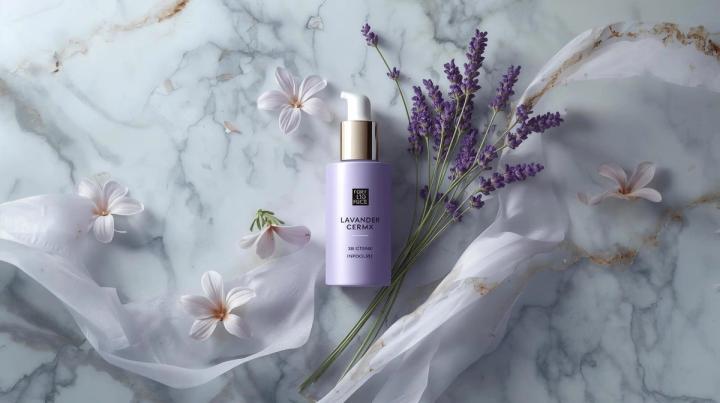
- Textured Surfaces: For a more organic feel, consider using surfaces like marble, slate, or wood.
- Fabric: Draping soft fabrics like linen or silk can add a touch of elegance and luxury.
You can also scale your backgrounds with AI to create an endless variety of scenes without needing physical backdrops.
Props
Props should be used thoughtfully to add context and visual interest. For skincare photography, consider using:
- Ingredients: Fresh botanicals, fruits, or other key ingredients can visually communicate the product’s formulation.
- Water: Droplets, splashes, or even a gentle mist can convey hydration and freshness.
- Geometric Shapes: Acrylic blocks, tiles, or other geometric props can create a modern, minimalist aesthetic.
Composition and Styling Tips
How you arrange the elements within your frame is just as important as the elements themselves. Strong composition can guide the viewer’s eye, create a sense of harmony, and make your images more dynamic and engaging.
- Rule of Thirds: Imagine your frame is divided into a 3x3 grid. Place your main subject at the intersection of these lines to create a more balanced and visually interesting composition.
- Leading Lines: Use lines within your scene (e.g., the edge of a prop, a shadow) to lead the viewer’s eye towards the product.
- Negative Space: Don’t be afraid to leave empty space around your product. This can create a sense of simplicity and elegance, and help the product stand out.
- Groupings and Arrangements: When shooting multiple products, arrange them in odd-numbered groups (e.g., three or five) for a more natural and appealing composition. For dropshippers looking to create compelling visuals, check out this guide to creating highly converting product visuals with AI.
Camera Settings
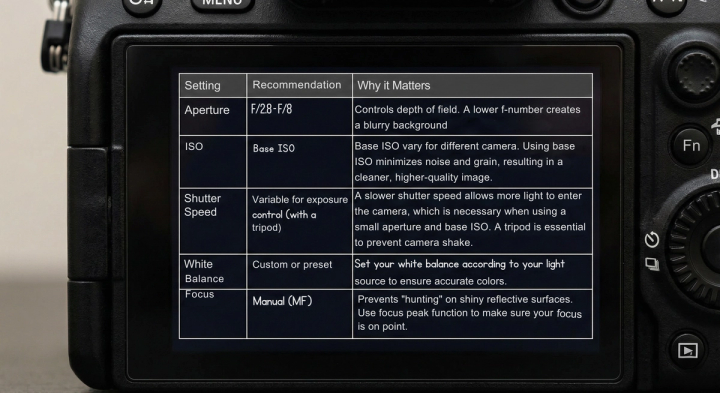
Nailing your camera settings is crucial for capturing sharp, well-exposed, and professional-looking images. While the ideal settings will vary depending on your lighting and creative vision, here’s a starting point for classic skincare photography.
Overcoming Common Skincare Photography Challenges
Skincare photography comes with its own unique set of challenges. Here’s how to tackle some of the most common issues:
- Reflections on Packaging: Shiny bottles and jars can create distracting reflections. Use a polarizing filter on your lens to minimize glare, or strategically position black and white cards around your product to control what is being reflected.
- Capturing Texture: To showcase the texture of a cream or serum, use a side-lighting technique to create subtle shadows that reveal the product’s consistency. A macro lens is also essential for getting those beautiful, detailed texture shots.
- Achieving Scale: Creating a large volume of high-quality images can be a major bottleneck for growing brands. This is where AI can be a game-changer. With a solution like Pikes, scaling your product photography is no longer a challenge, but an opportunity.
Post-Production and Editing Workflow
Editing is the final polish that takes your images from good to great. The goal is to enhance the image, not to alter it to the point of being misleading. A typical workflow might look like this:
- Culling and Selection: Go through your images and select the best shots. Look for sharpness, good composition, and proper exposure.
- Basic Adjustments: In a program like Adobe Lightroom or Capture One, make basic adjustments to exposure, contrast, and white balance.
- Retouching: In Adobe Photoshop, clean up any dust, scratches, or imperfections on the product or background. This is also where you can do more advanced color grading and composite multiple images if needed.
- Exporting: Export your final images in the correct size and format for your e-commerce platform. Or, you can skip the editing queue entirely with AI-powered editing tools.
Platform-Specific Requirements
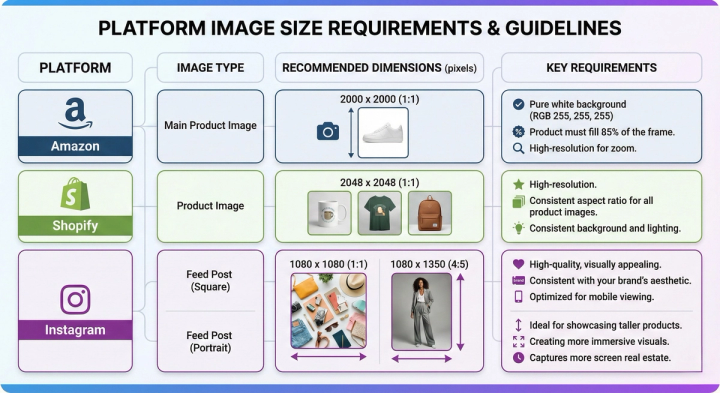
Different e-commerce platforms have their own specific requirements for product images. Adhering to these guidelines is essential for ensuring your images are displayed correctly and for maximizing their effectiveness. Here’s a quick reference guide for some of the most popular platforms.
How AI is Transforming Skincare Photography
The world of skincare photography is on the cusp of a major transformation, thanks to the power of artificial intelligence. AI-powered platforms like Pikes are revolutionizing the way brands create product visuals, offering a faster, more scalable, and often more cost-effective alternative to traditional photography.
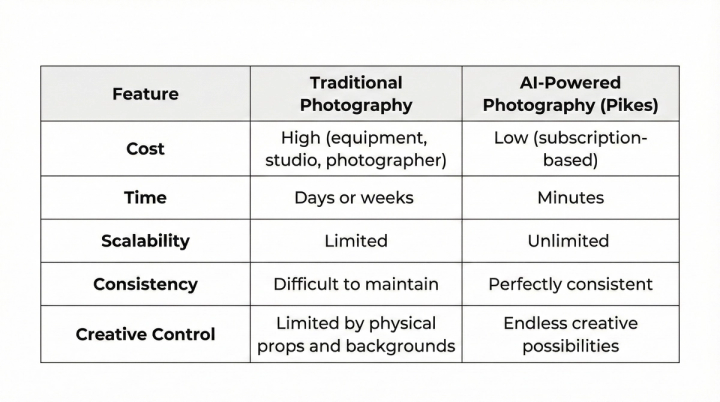
With Pikes, you can generate thousands of unique, high-quality product images in a fraction of the time and cost of a traditional photoshoot. It’s a powerful tool for any skincare brand looking to elevate their visual content and stay ahead of the competition.
Conclusion
High-quality skincare photography is an indispensable asset for any e-commerce brand. It builds trust, communicates value, and ultimately drives sales. While traditional photography requires a significant investment of time, money, and expertise, the barrier to entry has never been lower. Whether you’re starting with your smartphone and natural light or leveraging the power of AI with a platform like Pikes, you have the tools at your disposal to create stunning visuals that will captivate your audience and grow your brand. The future of skincare photography is here, and it’s more accessible than ever.
FAQ
1. What is the best camera for skincare photography?
While a full-frame DSLR or mirrorless camera will give you the highest quality results, you can still take amazing photos with an entry-level DSLR or even a newer smartphone. The most important thing is to understand the principles of lighting and composition.
2. How do I get a pure white background for my product photos?
The easiest way to achieve a pure white background is to use a white seamless paper backdrop and light it separately from your product. You can also use a lightbox or a light tent. In post-production, you can use the levels or curves adjustment in Photoshop to make the background pure white (255, 255, 255).
3. Can I use my phone for skincare photography?
Absolutely! Newer smartphones have incredibly capable cameras. To get the best results, use a tripod to keep your phone steady, shoot in good, diffused light, and use the phone’s manual or pro mode to control settings like ISO and white balance.
4. How much should I budget for skincare photography?
As our equipment table shows, you can get started for as little as $50. However, for a more professional setup, you should expect to invest at least $800-$1,500. Alternatively, you can use an AI photography platform like Pikes for a low monthly subscription.
5. What are the most important things to focus on for a beginner?
For beginners, the two most important things to master are lighting and composition. Learn how to use natural light effectively, and practice composing your shots using the rule of thirds. These two skills will have the biggest impact on the quality of your images.

Written by
Mike Lehman
Mike Lehman is a senior content strategist at Pikes. Before joining Pikes, Mike spent nearly a decade working with Glossier, Haus, and Athletic Brewing, leading campaigns that blended storytelling and data.