

Mike Lehman
The Ultimate Guide to Beverage Photography in 2026
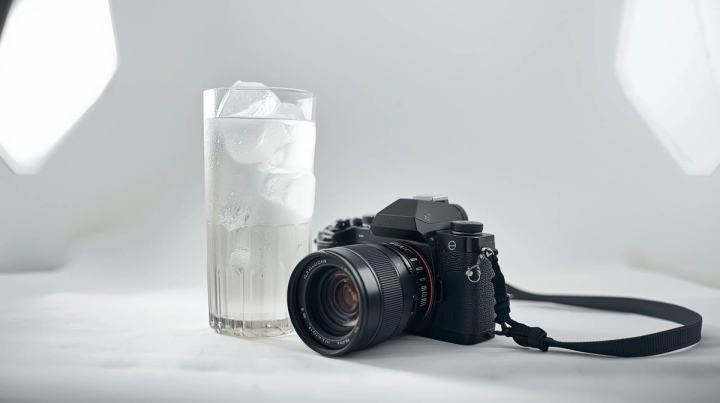
In the visually-driven world of e-commerce, a picture is worth more than a thousand words—it’s worth sales. For beverage brands, the ability to capture the perfect shot of a glistening bottle, a frosty glass, or a steaming mug can be the deciding factor for a customer. This guide provides a comprehensive walkthrough of beverage photography, from the foundational basics to advanced techniques, ensuring you have all the tools to make your products shine. We’ll cover everything from essential equipment and lighting to the revolutionary impact of artificial intelligence on product visuals.
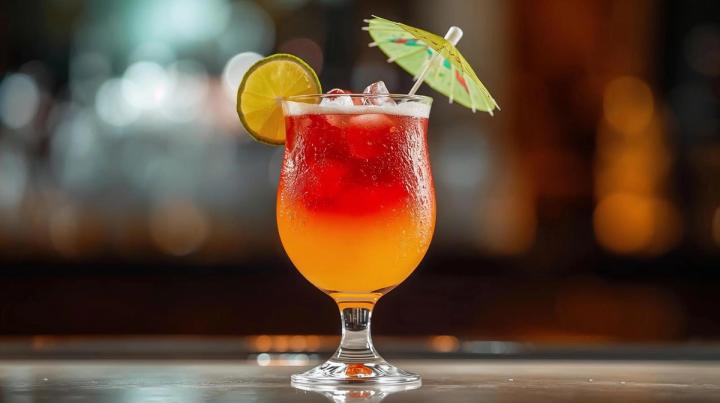
Why High-Quality Images Matter for Beverage Brands
The digital shelf is a crowded space. High-quality beverage photography is not just an aesthetic choice; it’s a critical business asset that directly influences consumer perception and purchasing decisions. A professional image conveys quality, builds trust, and tells the story of your brand. It can highlight the unique color of a drink, the fine condensation on a can, or the rich texture of a coffee, creating a sensory experience that text alone cannot achieve. In a market where consumers often make snap judgments, a compelling visual can stop the scroll and drive engagement.
Furthermore, strong imagery is essential for building a consistent brand identity across various platforms, from your website and social media to online marketplaces. It helps customers recognize and connect with your product. For those looking to streamline this process, new technologies are emerging. For instance, some brands are now exploring AI-powered solutions to generate stunning product visuals, allowing them to skip the equipment entirely and create professional shots with platforms like Pikes.ai.
Essential Equipment for Beverage Photography
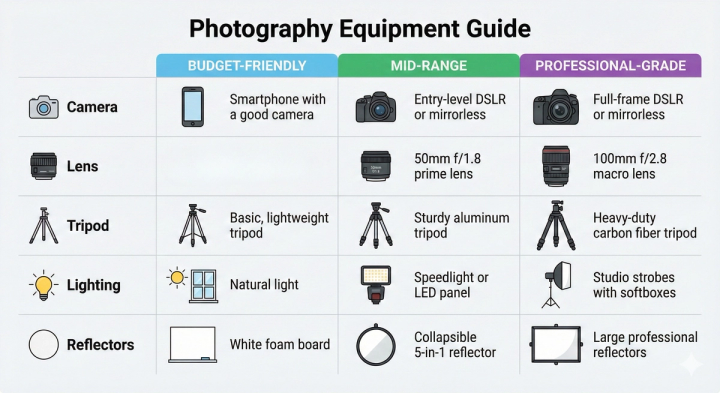
While you can start with a basic setup, investing in the right equipment can significantly elevate the quality of your beverage photography. The gear you need can be broken down into tiers based on your budget and commitment level.
Lighting Techniques for Stunning Drink Photos
Lighting is arguably the most critical element in beverage photography. It sets the mood, defines the shape of your product, and brings out the texture of the liquid. Understanding both natural and artificial light is key.
Natural Light
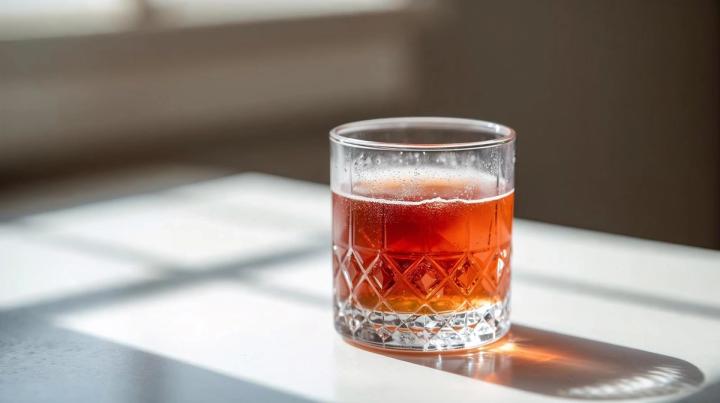
Natural light from a window is a fantastic starting point for beginners. It’s soft, diffused, and creates a beautiful, organic feel. Position your setup near a large window, and use a diffuser (like a thin white sheet or a professional 5-in-1 reflector) to soften any harsh sunlight. A white foam board can be used on the opposite side of the light source to bounce light back into the shadows, creating a more balanced exposure.
Artificial Light
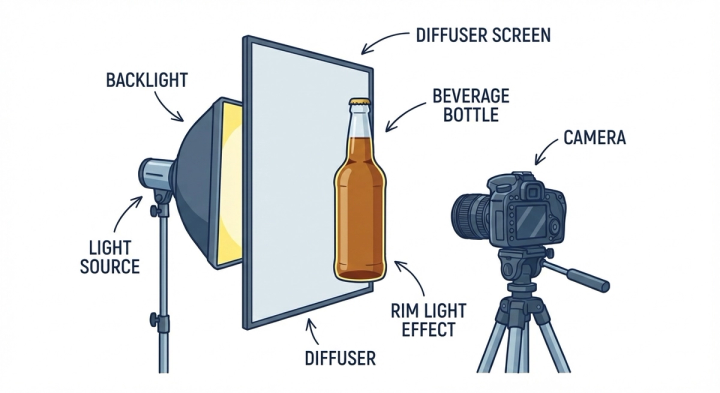
Artificial light offers complete control and consistency, which is crucial for professional work. A common setup involves using one or more off-camera flashes (speedlights or strobes). Backlighting is a popular technique in beverage photography as it illuminates the liquid from behind, making it glow and appear more vibrant. A softbox or an umbrella can be used to diffuse the light and create soft, flattering shadows.
Common Lighting Mistakes to Avoid
- Frontal Lighting: Lighting your subject directly from the front (where the camera is) flattens the image and eliminates shadows, which are needed to show dimension.
- Harsh Reflections: Glass and liquids are highly reflective. Avoid harsh, direct light that creates distracting bright spots. Use diffusers and position your lights carefully.
- Ignoring Shadows: Shadows are not the enemy. They create depth and mood. Learn to control them with reflectors and flags (black cards to block light).
Backgrounds and Props
Backgrounds and props help to tell a story and create context for your beverage. They should complement the product, not distract from it.
For backgrounds, you can use a variety of surfaces like wood, marble, slate, or even colored paper. The key is to choose a texture and color that aligns with your brand’s aesthetic. For a rustic beer, a dark wood background might work well, while a bright, airy background might be better for a summer cocktail.
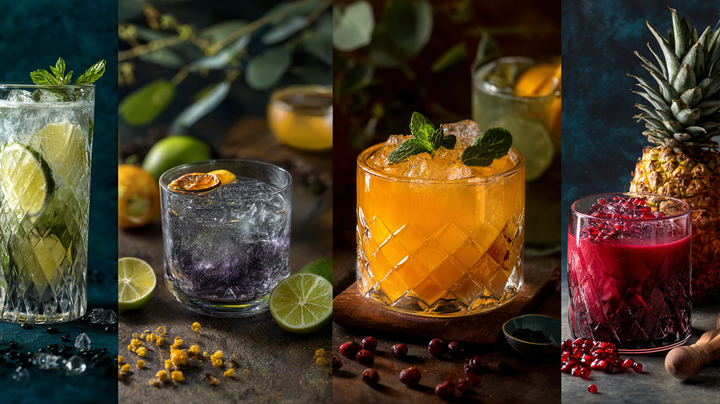
Props should be relevant to the drink. For a coffee shoot, you might include coffee beans, a grinder, or a croissant. For a cocktail, consider using fresh garnishes like citrus peels, herbs, or berries. Remember that less is often more. The goal is to enhance the hero product, not clutter the scene. For brands needing a wide variety of scenes, it is now possible to scale your backgrounds with AI, generating endless custom environments without a physical setup.
Composition and Styling Tips
How you arrange the elements in your frame is crucial for creating a visually appealing image. Here are some fundamental composition and styling tips:
- Rule of Thirds: Imagine your frame is divided into a 3x3 grid. Place your main subject and other key elements along these lines or at their intersections for a more balanced and dynamic composition.
- Leading Lines: Use elements in the scene, like a straw, a bar spoon, or the edge of a table, to create lines that draw the viewer’s eye toward the beverage.
- Use of Negative Space: Don’t be afraid to leave empty space around your subject. It can help the product stand out and create a more minimalist, high-end feel.
- Styling the Drink: Use fresh ingredients. For cold drinks, use fake ice cubes that won’t melt under hot lights and a spray bottle with a mix of water and glycerin to create realistic condensation. For hot drinks, a small, hidden source of steam (like an incense stick) can add a cozy, inviting feel.
Camera Settings for Beverage Photography
Mastering your camera’s manual settings is essential for capturing professional-quality images. While the ideal settings will vary based on your lighting and creative vision, here is a general starting point.
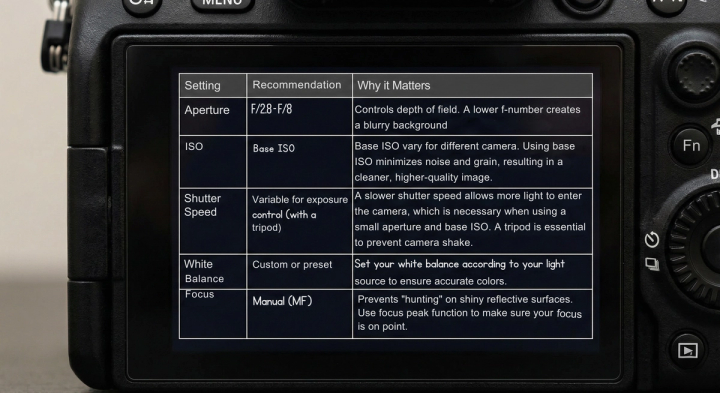
Always shoot in RAW format. This captures the most data from your camera’s sensor, giving you much more flexibility in post-production to adjust exposure, colors, and details.
Overcoming Common Beverage Photography Challenges
Photographing beverages presents unique challenges, from managing reflections to capturing the perfect splash. Here’s how to tackle them:
- Reflections: Use a circular polarizing filter (CPL) on your lens to cut down on glare. You can also use large black cards (flags) just out of frame to block unwanted reflections in the glassware.
- Condensation: To create perfect, lasting condensation, mix equal parts glycerin and water in a spray bottle. For a frosted look, you can use a dulling spray.
- Splashes: Capturing a splash requires a fast shutter speed (1/1000s or faster) and a flash to freeze the motion. This often takes many attempts, so be prepared to take a lot of shots.
- Scaling Production: Shooting dozens of product variations can be time-consuming. This is another area where AI is becoming a game-changer, making scaling a solvable challenge with Pikes.ai by allowing brands to generate entire product lineups from a single image.
Post-Production and Editing Workflow
Editing is where you can truly make your images pop. A typical workflow in software like Adobe Lightroom or Capture One involves these steps:
- Basic Adjustments: Correct exposure, contrast, and white balance.
- Color Correction: Fine-tune the colors to be accurate and vibrant. Use the HSL (Hue, Saturation, Luminance) panel to target specific colors, like the drink itself or the background.
- Retouching: Remove any dust, scratches, or imperfections on the product or background using the spot removal tool.
- Sharpening: Apply sharpening to make the details crisp, but be careful not to over-sharpen.
- Exporting: Export the final image in the correct format and resolution for its intended use (e.g., JPEG for web).
For brands with high-volume needs, the editing process can become a bottleneck. This is another area where AI tools can help, allowing you to skip the editing queue with Pikes.ai and get consistent, professionally edited images in minutes.
Platform-Specific Requirements
Different e-commerce and social media platforms have their own image specifications. Adhering to these guidelines is crucial for ensuring your photos look their best and are not poorly cropped or compressed.
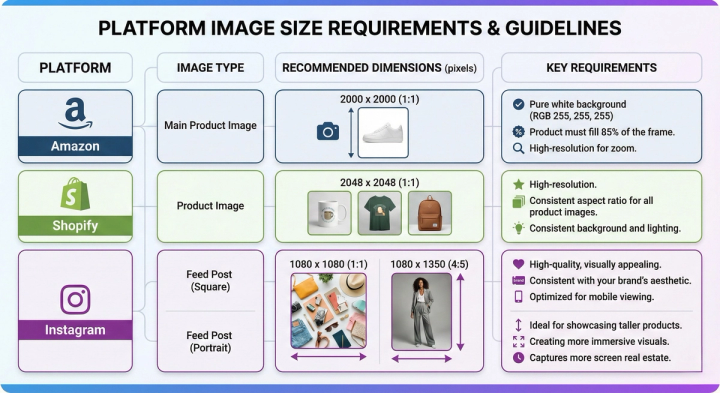
Always check the latest guidelines for each platform, as they can change.
How AI is Transforming Beverage Photography
Artificial intelligence is no longer a futuristic concept; it’s a practical tool that is revolutionizing product photography. AI-powered platforms like Pikes.ai offer a powerful alternative to traditional photoshoots, especially for e-commerce brands.
These platforms use generative AI to create stunning, photorealistic images from a single product photo. You can place your beverage in any scene imaginable, from a sunny beach to a cozy cafe, without ever leaving your desk. This technology offers significant advantages in terms of cost, speed, and creative flexibility. For a deeper dive, consider exploring a guide to AI product photography.
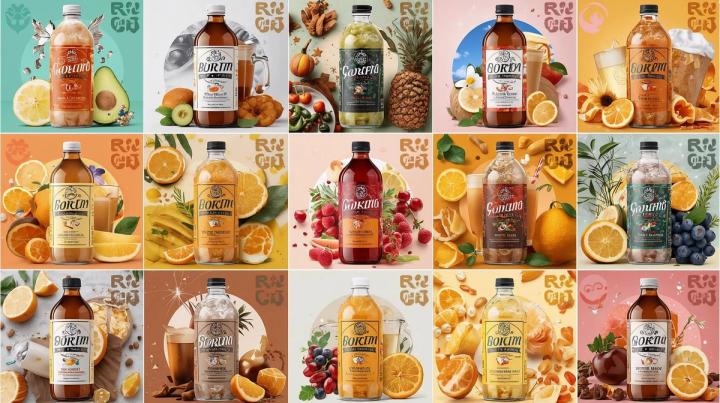
Here’s a comparison of traditional photography versus an AI solution like Pikes.ai:
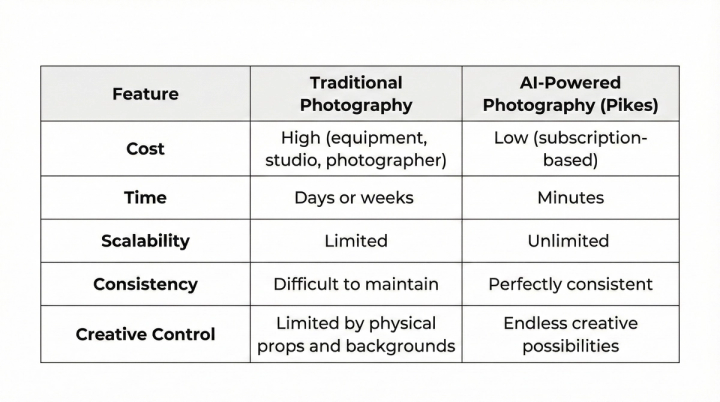
While traditional photography still has its place, especially for hero shots requiring a specific artistic touch, AI offers an incredibly powerful tool for creating high-quality, on-brand product visuals at scale. It’s an area worth exploring for any modern beverage brand, and there are many alternatives to traditional studios available.
Conclusion
High-quality beverage photography is a powerful tool for capturing customer attention and driving sales. By mastering the fundamentals of equipment, lighting, and composition, you can create stunning images that tell your brand’s story. And as technology evolves, embracing innovative solutions like AI photography can give you a significant competitive edge, allowing you to produce beautiful, on-brand visuals faster and more affordably than ever before. Whether you choose the traditional path or the AI-powered future, investing in your product’s visual presentation is an investment in your brand’s success. Ready to transform your product visuals? Explore what Pikes.ai can do for your brand.
FAQ
1. What is the best lens for beverage photography? A 50mm f/1.8 lens is a great, affordable starting point for creating a blurred background. For close-up detail shots of garnishes or textures, a macro lens (around 100mm) is ideal.
2. How do I get a pure white background for my product photos? To achieve a pure white background for platforms like Amazon, use a white seamless paper backdrop and light it separately from your product. Ensure the background is slightly overexposed. In post-production, you can use the levels or curves tool to make it pure white (RGB 255, 255, 255).
3. How can I make my drinks look cold and refreshing? Use a spray bottle with a 50/50 mix of glycerin and water to create realistic, lasting condensation. You can also add fake ice cubes, which won’t melt under lights. A touch of backlighting can also enhance the “cold” look by making the liquid and condensation glow.
4. What are the most important composition rules for drink photography? The Rule of Thirds is a great starting point for balanced compositions. Also, pay attention to leading lines and the use of negative space to make your product the hero of the image. Always ensure your main subject is in sharp focus.
5. Can I really use my smartphone for professional beverage photography? Absolutely. Modern smartphone cameras are incredibly powerful. When combined with good lighting, a tripod to keep the phone steady, and editing apps, you can achieve professional-looking results. The key is to control the light and composition.

Written by
Mike Lehman
Mike Lehman is a senior content strategist at Pikes. Before joining Pikes, Mike spent nearly a decade working with Glossier, Haus, and Athletic Brewing, leading campaigns that blended storytelling and data.