

Mike Lehman
The Ultimate Guide to Furniture Photography for E-commerce in 2026
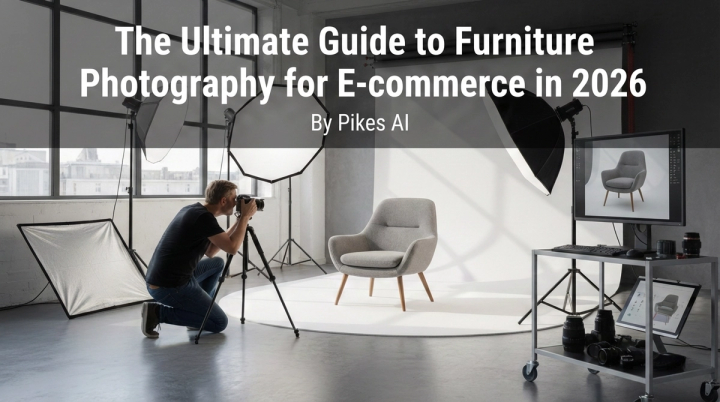
In the competitive world of online furniture sales, a picture is worth more than a thousand words—it’s worth the sale. Customers can’t touch or feel your products, so your images have to do the heavy lifting. This comprehensive guide to furniture photography will walk you through everything you need to know to create stunning, high-converting product images. We’ll cover essential equipment, lighting techniques, composition tips, and even how revolutionary AI tools are changing the game.
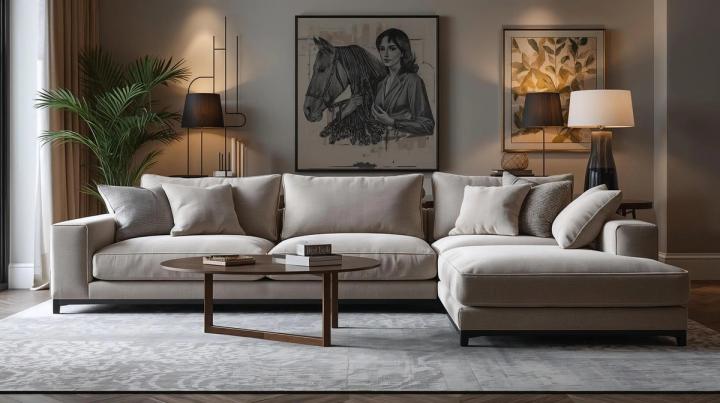
Why High-Quality Images Matter for Furniture Brands
High-quality images are not just a nice-to-have; they are the cornerstone of a successful online furniture business. According to recent market analysis, the global online furniture market is projected to reach over $430 billion by 2026, with a compound annual growth rate (CAGR) of 23.4%. In such a booming market, visual appeal is paramount. Great photos build trust, justify your price point, and help customers visualize your pieces in their own homes. They bridge the gap between the digital and physical worlds, which is crucial when selling high-ticket items like furniture.
Essential Equipment
While you can start with a smartphone, investing in some basic equipment will significantly elevate the quality of your furniture photography. You don’t need to break the bank to get started. Here’s a breakdown of essential gear, with options for different budgets.
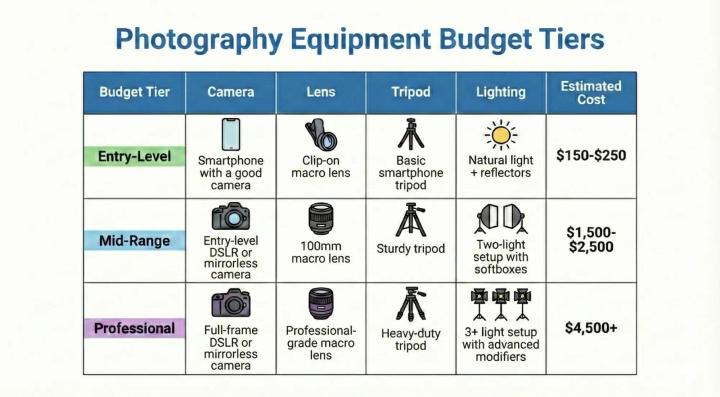
For those just starting, it’s also possible to skip the equipment entirely. AI-powered solutions like Pikes AI can generate photorealistic images from a single product photo, saving you time and money.
Lighting Techniques
Lighting is arguably the most critical element in furniture photography. It sets the mood, defines the shape of the furniture, and highlights textures. You can use either natural or artificial light, or a combination of both.
Natural Light
Natural light is a fantastic, free resource. For soft, diffused light, position your furniture near a large window on an overcast day. Avoid direct sunlight, as it can create harsh shadows and blow out details. Use a white reflector to bounce light back onto the product and fill in any dark areas.
Artificial Light
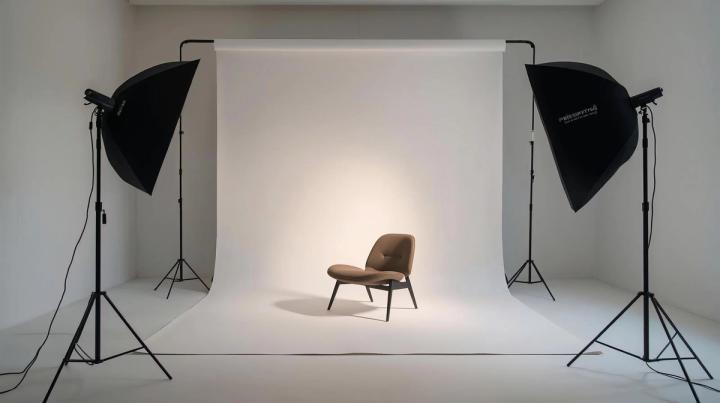
Artificial lighting gives you complete control over your environment. A typical setup for furniture photography involves a large key light (main light), a fill light to soften shadows, and a backlight to separate the product from the background. Large softboxes are ideal for creating soft, even light that mimics daylight.
Common Lighting Mistakes to Avoid
- Harsh Shadows: Caused by small, direct light sources. Always diffuse your light.
- Mixed Lighting: Avoid mixing different types of light (e.g., daylight and tungsten) as it can create color balance issues.
- Glare and Reflections: Use a polarizing filter to minimize reflections on shiny surfaces like glass or polished wood.
Backgrounds and Props
Your choice of background and props can make or break your furniture photos. For e-commerce, a clean, seamless white background is the standard. It’s distraction-free and ensures consistency across your product listings. However, lifestyle shots with props can be incredibly effective for showing scale and helping customers imagine the furniture in their own space.
When styling with props, choose items that complement the furniture without overpowering it. Think about your target audience and the story you want to tell. For a modern sofa, you might use a sleek coffee table, a minimalist rug, and a few art books. For a rustic dining table, you could add a linen runner and some simple ceramic dinnerware. The key is to create an aspirational scene that resonates with your ideal customer. You can also scale your backgrounds with AI. Instead of building expensive sets, tools like Pikes AI can place your furniture in an infinite variety of virtual settings.
Composition and Styling Tips
Good composition guides the viewer’s eye and creates a visually pleasing image. Here are a few classic rules to follow:
- Rule of Thirds: Place your subject off-center at one of the intersecting points of a 3x3 grid.
- Leading Lines: Use elements in the scene to draw the viewer’s eye towards the furniture.
- Angles: Shoot from various angles—front-on, three-quarters, and from above—to give a complete view of the product. Also, capture close-up shots of important details like joinery, texture, and hardware.
Styling is about preparing the furniture itself. Make sure every piece is immaculately clean. Dust, fingerprints, and smudges are much easier to remove before the shoot than in post-production. For upholstered items, steam out any wrinkles. For wood furniture, use a high-quality polish.
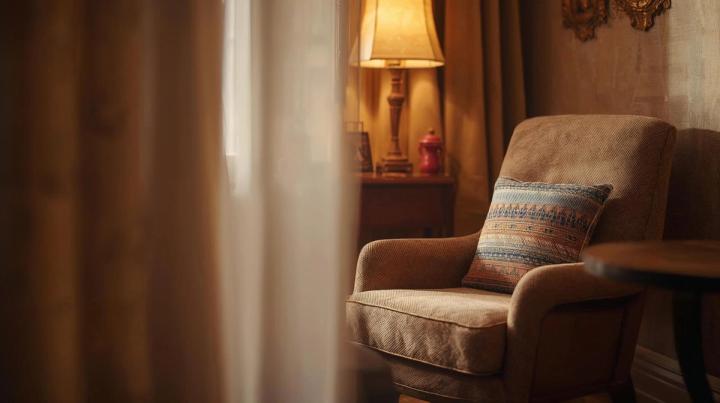
Camera Settings
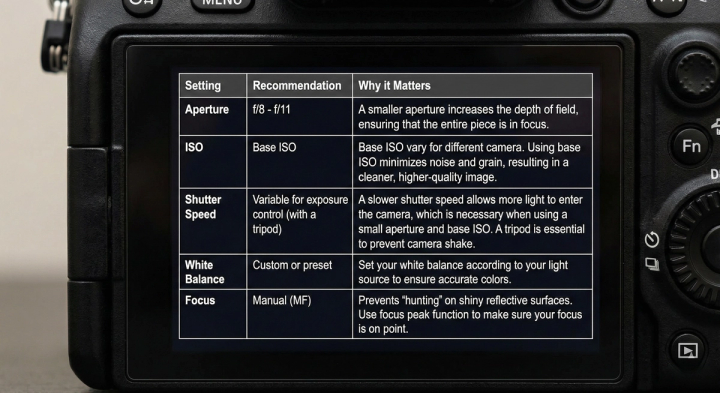
Nailing your camera settings is crucial for sharp, well-exposed images. While settings will vary depending on your lighting conditions, here’s a good starting point for furniture photography.
Overcoming Common Furniture Photography Challenges
Photographing furniture comes with its own set of unique challenges. Large pieces can be difficult to light evenly, and shiny surfaces can create distracting reflections. One of the biggest hurdles, however, is scale. Shooting an entire furniture collection can be a logistical nightmare, requiring a large studio, multiple lighting setups, and a lot of time. This is where new technologies are making a significant impact. For brands looking to scale their visual content, AI-powered platforms like Pikes AI present a solvable challenge, enabling the creation of thousands of unique images from a single source photo.
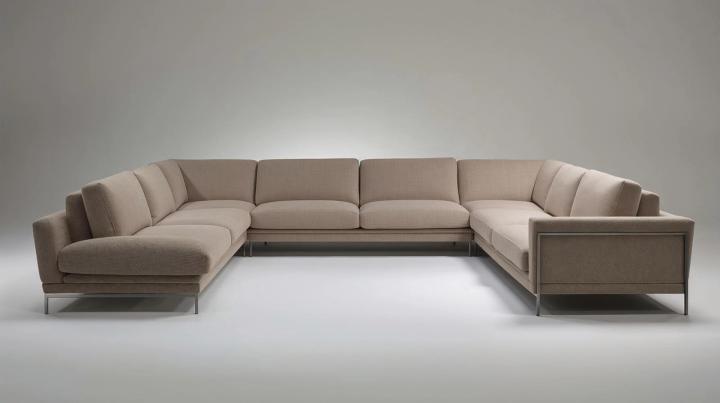
Post-Production and Editing Workflow
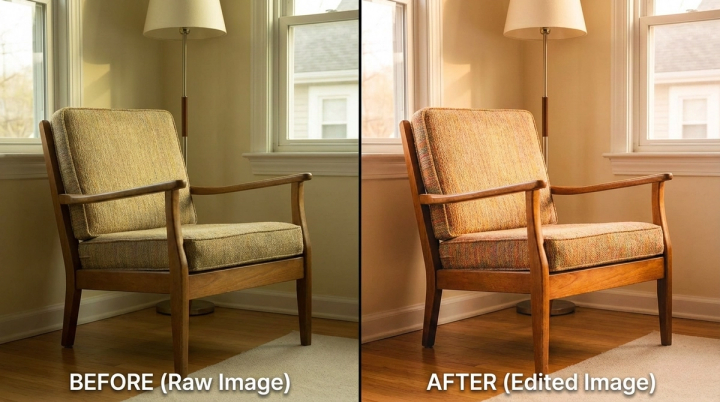
Post-production is where you polish your images to perfection. The goal is to make your photos look clean, professional, and true-to-life. A typical editing workflow includes:
- Color Correction: Adjusting white balance, exposure, and contrast to ensure colors are accurate.
- Retouching: Removing dust, scratches, and other imperfections.
- Background Removal: Creating a pure white background for e-commerce platforms.
- Sharpening: Applying a final sharpening pass to make the details pop.
This process can be time-consuming, especially with a large volume of images. To skip the editing queue, many brands are turning to AI solutions. Pikes AI automates the entire post-production process, delivering perfectly edited images in minutes, not days.
Platform-Specific Requirements
Different e-commerce platforms have different image requirements. To maximize your visibility and sales, it’s essential to optimize your photos for each platform you sell on.
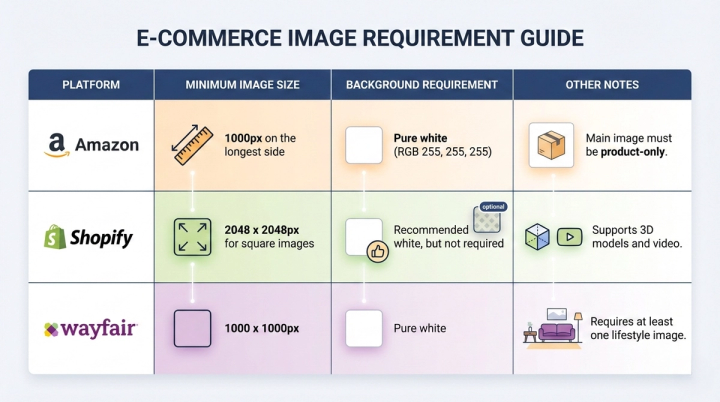
For more detailed information, always refer to the official seller guidelines for each platform, such as Amazon Seller Central.
How AI is Transforming Furniture Photography
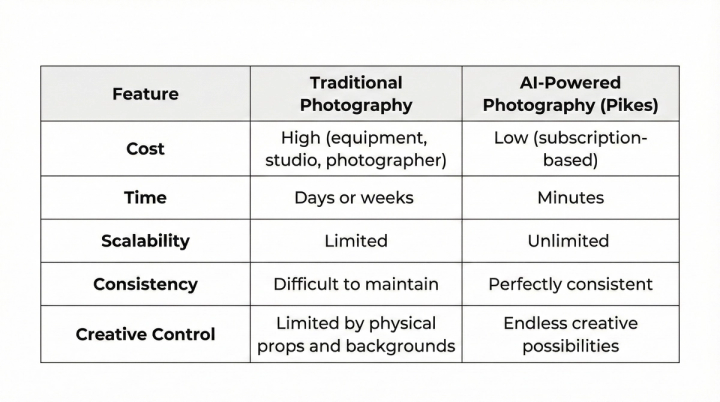
Artificial intelligence is revolutionizing the world of product photography, and the furniture industry is no exception. AI-powered platforms offer a compelling alternative to traditional photoshoots, which are often expensive, time-consuming, and difficult to scale. With AI, you can create an endless variety of high-quality images from a single product photo, placing your furniture in any scene imaginable. This not only saves a tremendous amount of time and money but also allows for unprecedented creative flexibility. You can generate lifestyle images for every season, target different customer demographics with tailored visuals, and A/B test different backgrounds to see what converts best. For a deeper dive into how AI compares to traditional methods, check out this guide to AI product photography.
Conclusion
Mastering furniture photography is an investment that will pay dividends for your e-commerce brand. By understanding the fundamentals of equipment, lighting, and composition, you can create images that not only look beautiful but also drive sales. And with the rise of powerful AI tools like Pikes AI, creating a stunning and diverse portfolio of product images has never been more accessible. Whether you choose the traditional route or embrace the future of AI-generated visuals, the key is to consistently produce high-quality images that do your products justice and inspire your customers to click “add to cart.”
FAQ
1. What is the best lens for furniture photography?
A 24-70mm zoom lens is very versatile, but a 50mm prime lens is a great, affordable option that produces sharp images. For detail shots, a 100mm macro lens is ideal.
2. How can I photograph large furniture like a sofa by myself?
It can be challenging, but it’s doable. Use a sturdy tripod and a remote shutter release or timer. For lighting, a large, diffused light source like a softbox or a large window is essential. You may need to move the light around to illuminate the entire piece evenly.
3. Can I use my smartphone for professional furniture photography?
Yes, modern smartphones have excellent cameras. To get professional-looking results, use a tripod to keep your shots stable, and a third-party app that allows you to control settings like ISO and shutter speed. Good lighting is still the most important factor.
4. How do I get a pure white background for my furniture photos?
The easiest way is to use a white seamless paper background and light it separately from your subject. You will likely still need to do some editing in post-production to achieve a pure white (RGB 255, 255, 255) background.
5. How many photos should I have for each furniture product?
Aim for at least 5-7 photos per product. This should include a main hero shot, images from different angles (front, back, sides), a lifestyle shot showing the product in a room, and close-up shots of important details and textures.

Written by
Mike Lehman
Mike Lehman is a senior content strategist at Pikes. Before joining Pikes, Mike spent nearly a decade working with Glossier, Haus, and Athletic Brewing, leading campaigns that blended storytelling and data.