

Mike Lehman
The Ultimate Guide to Stunning Food Photography in 2026
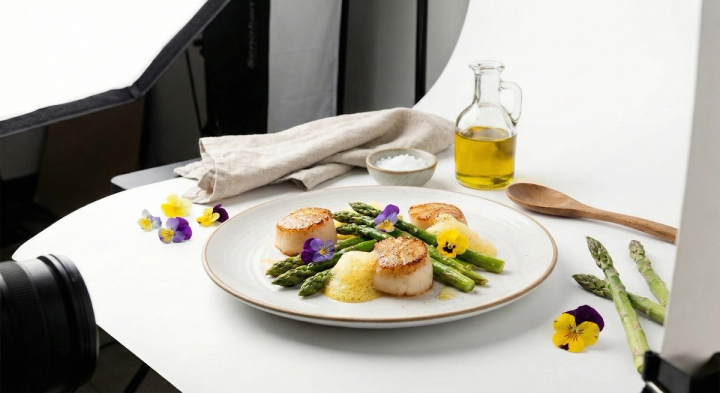
In the bustling digital marketplace of 2026, where consumers scroll through an endless sea of content, high-quality food photography is no longer a luxury—it’s a necessity. For food brands, restaurants, and bloggers, a single, stunning image can be the difference between a customer’s fleeting glance and a sale. It’s the silent ambassador of your brand, communicating taste, quality, and passion before a single word is read. This guide will walk you through everything you need to know to create mouth-watering food photography that captivates your audience and elevates your brand. From essential equipment and lighting techniques to the revolutionary impact of AI, you’ll learn how to produce professional-grade images that not only look delicious but also drive engagement and sales.
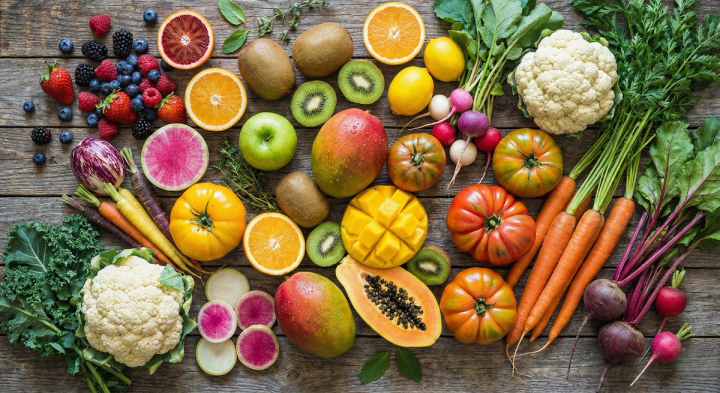
Why High-Quality Images Matter for Food Brands
In the food industry, we eat with our eyes first. A study by ElectroIQ found that 90% of information transmitted to the brain is visual, and visuals are processed 60,000 times faster than text. For food brands, this means your product photography is the most critical touchpoint in your customer’s journey. It’s your digital storefront, your menu, and your first impression all rolled into one. High-quality images build trust, convey professionalism, and create a sensory experience that can entice a customer to purchase. In a crowded market, exceptional food photography sets you apart, telling a story of quality and care that resonates with your audience. For e-commerce brands, this is even more critical, as explained in the AI product photography guide.
Essential Equipment for Food Photography
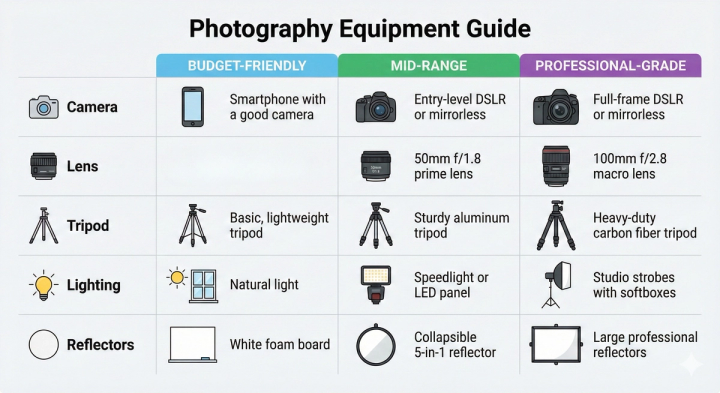
Starting in food photography can feel overwhelming, but you don’t need a Hollywood-level budget to get started. The key is to invest in the right pieces of equipment that will grow with you. However, if you want to skip the equipment entirely, AI-powered solutions like Pikes.ai can generate stunning, professional-grade food photography without a single piece of gear.
Here’s a breakdown of essential equipment across different budget tiers:
Lighting Techniques for Mouth-Watering Images
Lighting is the soul of a photograph. It shapes the mood, defines the texture, and brings your food to life. Mastering lighting is non-negotiable for professional results.
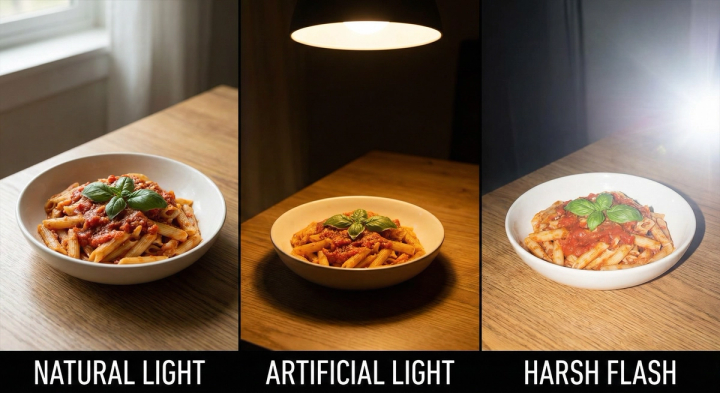
Natural Light
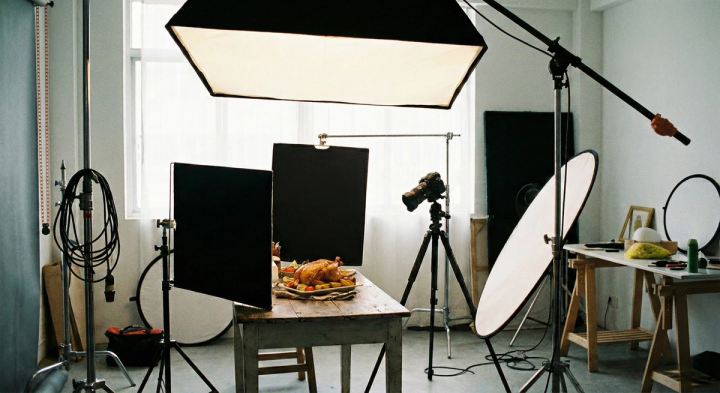
Natural light is the go-to for many food photographers due to its soft, beautiful quality. Position your setup near a large window, but out of direct sunlight. Use a diffuser to soften harsh light and a white foam board to bounce light back into the shadows, creating a balanced and airy feel.
Artificial Light
Artificial light offers consistency and control, allowing you to shoot at any time of day. A single, large light source (like a softbox or umbrella) positioned to the side or behind the subject can mimic the look of natural window light. This is the secret to achieving that bright, professional look you see in magazines. For those looking to explore alternatives to traditional studio setups, there are many Soona alternatives that can provide similar results.
Common Lighting Mistakes to Avoid:
- Front-on flash: This creates harsh, flat light that kills texture and depth.
- Direct, hard sunlight: This leads to blown-out highlights and dark, distracting shadows.
- Multiple light sources with different color temperatures: This results in an unnatural, messy look that is difficult to correct in post-production.
Backgrounds and Props
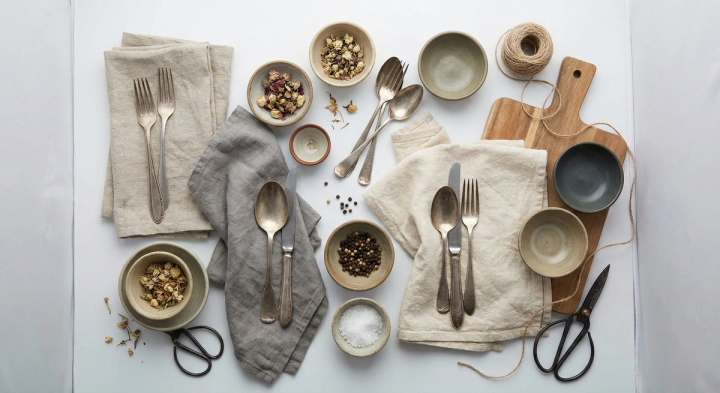
Backgrounds and props are the supporting cast that helps your hero dish shine. They add context, texture, and a sense of story to your images. The key is to choose props that complement the food, not overpower it. Think about the story you want to tell. Is it a rustic, farm-to-table meal or a modern, minimalist dessert? Your choice of surfaces, cutlery, and linens should reflect that narrative. For dropshippers looking to create compelling visuals, understanding how to use props effectively is a game-changer, as detailed in this guide to creating converting product visuals.
And what if you need an endless variety of backgrounds? You can scale your backgrounds with AI. Instead of buying and storing dozens of physical backdrops, platforms like Pikes.ai allow you to place your product into any environment imaginable, from a marble countertop to a rustic wooden table, with just a few clicks.
Composition and Styling Tips
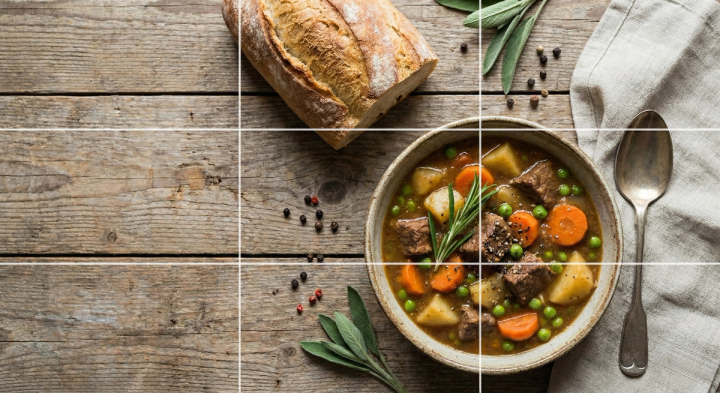
Composition is the art of arranging elements within your frame to create a visually appealing and balanced image. Here are a few fundamental principles:
- The Rule of Thirds: Imagine your frame is divided into a 3x3 grid. Place your main subject at the intersection of these lines to create a more dynamic and interesting composition.
- Leading Lines: Use lines within your scene (like the edge of a table or a piece of cutlery) to guide the viewer’s eye toward the main subject.
- Negative Space: Don’t be afraid of empty space. It can help your subject stand out and create a sense of elegance and simplicity.
- The Golden Triangle: This is a more advanced technique where you divide the frame with a diagonal line and then draw lines from the other corners to meet the main line at a 90-degree angle. Placing elements along these lines creates a sense of movement and harmony.
Styling is about making the food look its absolute best. Use tweezers to place small garnishes, a spray bottle to create a fresh-out-of-the-oven look, and a little bit of oil to add a beautiful sheen. For those looking for more advanced styling tools, exploring Pebblely alternatives can offer a suite of AI-powered styling options.
Camera Settings for Perfect Food Photos
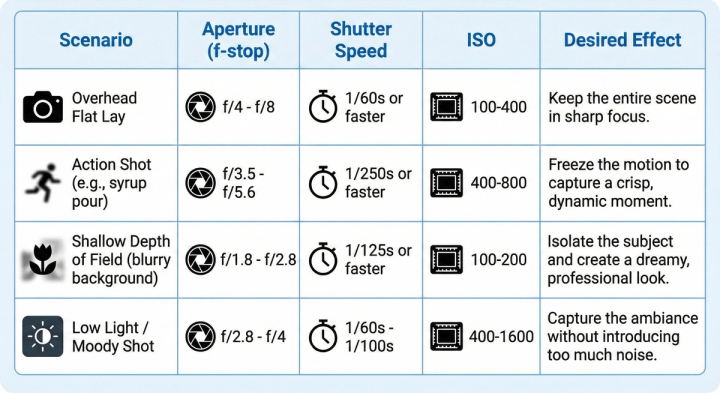
Shooting in manual mode gives you complete creative control over your images. While it can be intimidating at first, understanding the exposure triangle—aperture, shutter speed, and ISO—is the key to unlocking your camera’s full potential.
Here are some starting points for common food photography scenarios:
Overcoming Common Food Photography Challenges
Every food photographer faces hurdles. Here are some common challenges and how to overcome them:
- Melting & Wilting: Food has a short shelf life under hot lights. Work quickly, have backups ready, and use stand-ins (like a piece of cardboard cut to the size of your hero product) while you set up your lighting and composition.
- Unappetizing Colors: Your camera’s white balance can sometimes misinterpret colors. Shoot in RAW format and use a grey card to set a custom white balance for accurate, vibrant colors.
- Reflections on Cutlery and Glassware: Use a polarizing filter to cut down on glare, or strategically place black foam core boards just out of frame to block unwanted reflections.
- Scaling Content Creation: Creating consistently high-quality images for a growing product line or a high-volume restaurant can be a major bottleneck. This is where AI can be a powerful ally. For brands struggling to scale, this is a solvable challenge with platforms like Pikes.ai, which can generate an entire product catalog’s worth of images in a fraction of the time and cost of a traditional photoshoot. For those looking for more options, there are also several great Kive alternatives to explore.
Post-Production and Editing Workflow
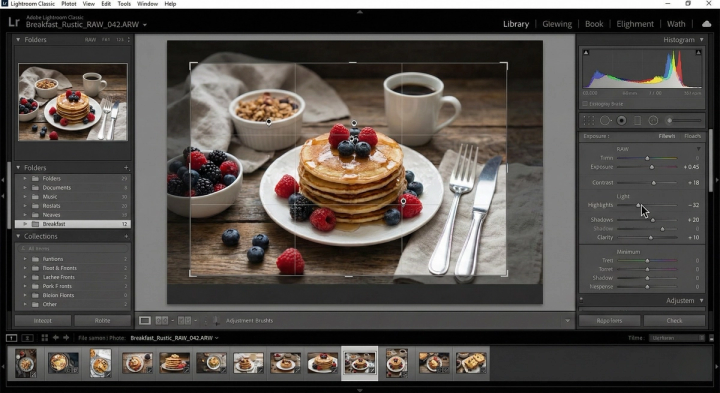
Editing is where you polish your images and bring your creative vision to life. A consistent editing style is crucial for building a recognizable brand. The goal is to enhance the image, not fundamentally change it. Your workflow should be efficient and repeatable.
- Cull and Organize: Start by selecting the best images from your shoot. Use a tool like Adobe Lightroom or Capture One to rate and organize your photos.
- Basic Adjustments: Begin with global adjustments. Correct the white balance, exposure, contrast, and saturation. The goal is to create a clean, accurate base.
- Local Adjustments: Use adjustment brushes or radial filters to selectively brighten, darken, or enhance specific parts of the image. This is where you can make the hero dish pop.
- Sharpening and Noise Reduction: Apply sharpening to bring out the texture in the food, but be careful not to overdo it. If you shot at a high ISO, use noise reduction to clean up any graininess.
- Export: Export your final images in the correct size and format for their intended platform. For those tired of this process, you can skip the editing queue entirely with AI. Tools like Pikes.ai can automate the entire post-production process, delivering perfectly edited images in seconds.
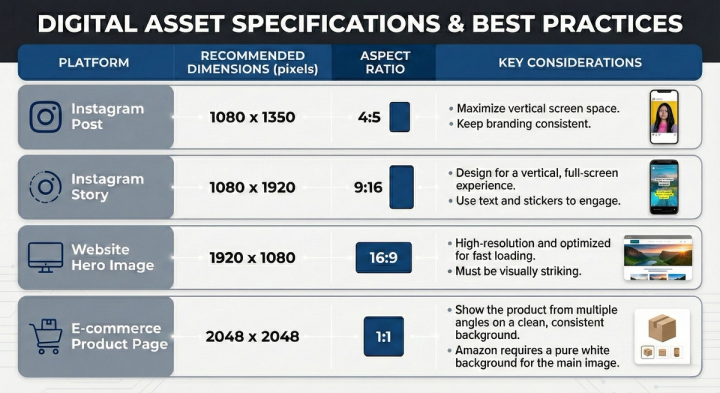
Platform-Specific Requirements
Where your images will be displayed matters. Different platforms have different technical and stylistic requirements. A one-size-fits-all approach will dilute the impact of your photography.
How AI is Transforming Food Photography
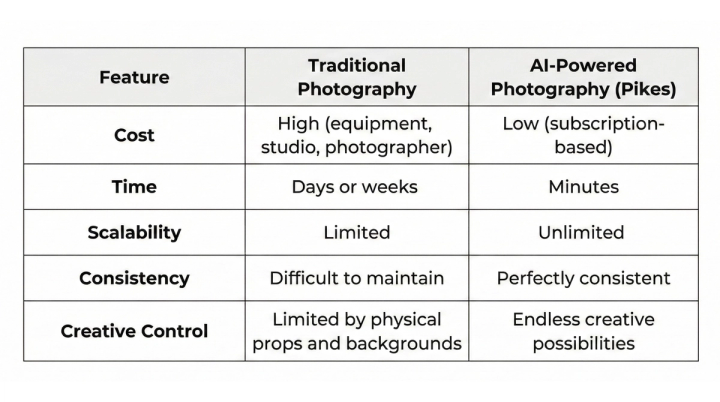
Artificial intelligence is no longer a futuristic concept—it’s a powerful tool that is democratizing high-quality food photography. For years, professional-grade visuals were accessible only to brands with deep pockets. AI is changing that. This is a significant shift, as noted in a recent industry guide on visual education.
Here’s a comparison of the traditional workflow versus an AI-powered approach with a platform like Pikes.ai:
Conclusion
In 2026, captivating food photography is the cornerstone of a successful food brand. It’s a powerful language that speaks to our most primal desires, and mastering it is one of the highest-leverage investments you can make in your brand. Whether you choose the hands-on, artisanal path of traditional photography or embrace the speed and scalability of AI, the principles of quality, storytelling, and consistency remain the same. The tools are more accessible than ever, and the opportunity to create stunning, scroll-stopping food photography is in your hands. Ready to transform your food brand’s visuals? Explore what Pikes.ai can do for you today.
FAQ
1. What is the best lens for food photography?
For beginners, a 50mm f/1.8 lens (the “nifty fifty”) is a fantastic and affordable starting point. It’s versatile and great for creating that beautiful, blurry background. For more advanced photographers, a 100mm macro lens is ideal for capturing intricate details and textures.
2. Can I really use my smartphone for professional food photography?
Absolutely. Modern smartphones have incredibly capable cameras. When combined with good lighting, thoughtful composition, and a solid editing app (like Lightroom Mobile), you can create stunning images that are more than suitable for social media and websites.
3. How do I find my unique food photography style?
Your style will evolve over time. Start by creating mood boards on Pinterest of images you love. Analyze what you’re drawn to—is it light and airy, dark and moody, or vibrant and colorful? Experiment with different lighting, props, and editing techniques until you find a look that feels authentic to you and your brand.
4. What is the most common mistake beginners make in food photography?
The most common mistake is poor lighting. Many beginners use their kitchen’s overhead lights or the on-camera flash, which creates harsh, unflattering shadows. Always use natural light from a window or a single, diffused artificial light source to create soft, appealing light.
5. How can AI help me if I’m a total beginner?
AI platforms like Pikes.ai are perfect for beginners because they handle all the technical aspects for you. You don’t need to understand cameras, lighting, or editing. You simply upload a photo of your product, and the AI generates professional, studio-quality images in any style you can imagine, allowing you to focus on the creative and strategic side of your business.

Written by
Mike Lehman
Mike Lehman is a senior content strategist at Pikes. Before joining Pikes, Mike spent nearly a decade working with Glossier, Haus, and Athletic Brewing, leading campaigns that blended storytelling and data.