

Mike Lehman
The Ultimate Guide to Pet Product Photography in 2026
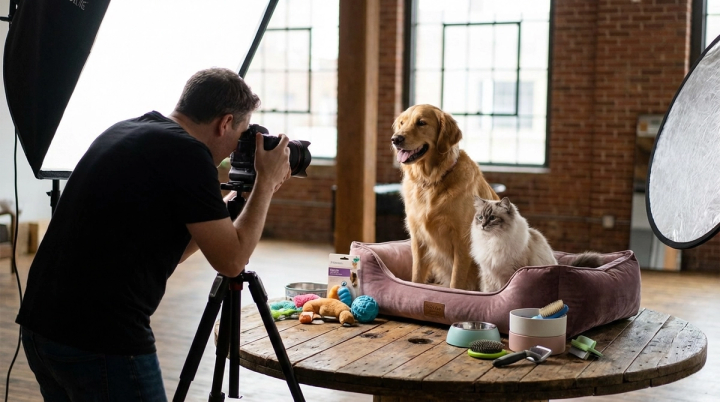
In the booming pet product market, captivating visuals are no longer a luxury—they are a necessity. This guide provides a comprehensive walkthrough of pet product photography, from essential equipment and lighting techniques to advanced post-production and the revolutionary role of AI in creating stunning product images. We will cover everything you need to know to create professional-quality images that will make your products fly off the virtual shelves.
Why High-Quality Images Matter for Pet Product Brands
The e-commerce landscape for pet products is fiercely competitive. With the global pet care market projected to reach $427.75 billion by 2032, standing out is crucial. High-quality images do more than just showcase your products; they build trust, convey quality, and create an emotional connection with pet owners. Poor-quality images can deter potential customers, making professional-looking photography a critical investment for any pet product brand. In a digital marketplace where consumers cannot physically touch or inspect a product, images become the primary tool for evaluation. They communicate not just the physical attributes of a product, but also the brand’s values and attention to detail. A well-crafted image can tell a story, evoke emotion, and create a desire for the product, ultimately leading to higher conversion rates and increased customer loyalty.
Essential Equipment for Pet Product Photography
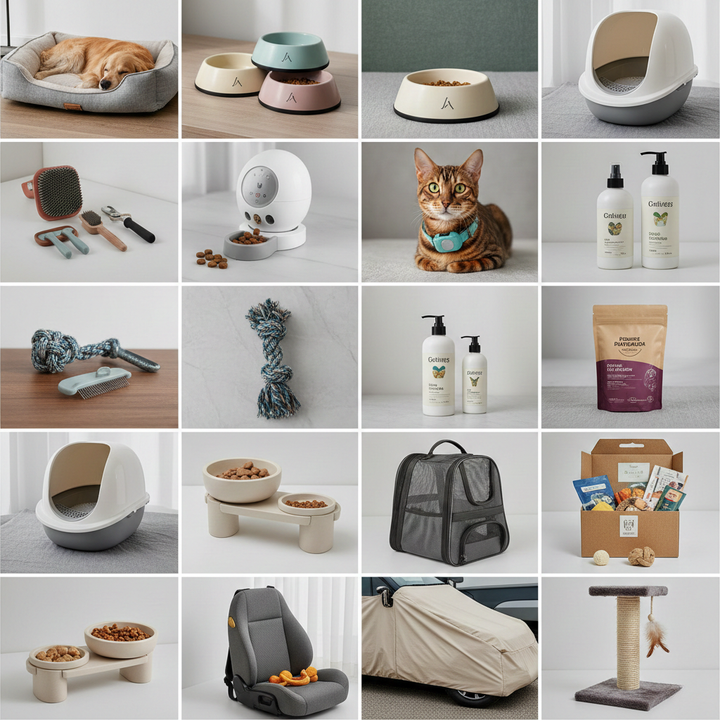
[IMAGE: A flat lay of pet product photography equipment]
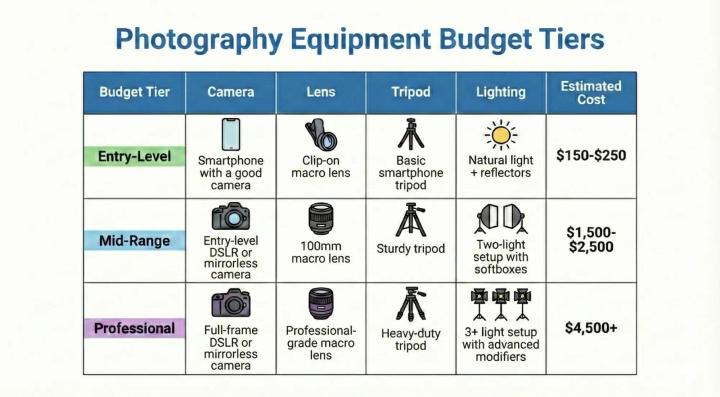
While you can start with a modest setup, investing in the right equipment will significantly improve the quality of your photos. However, for those looking to bypass the hardware investment, AI-powered solutions like Pikes AI can generate professional-grade product photos without any equipment at all.
Lighting Techniques for Perfect Shots
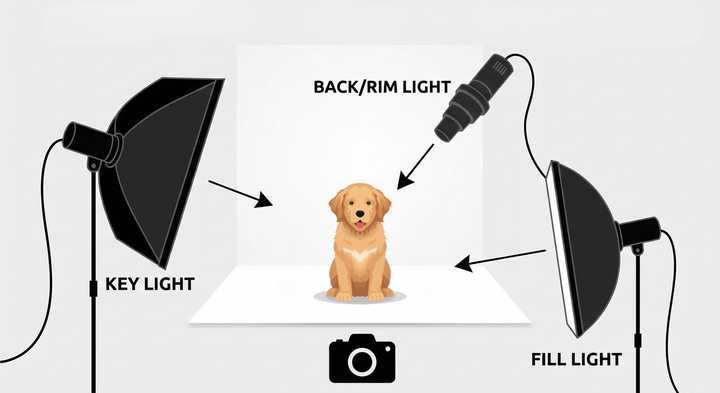
Lighting is arguably the most critical element in photography. It sets the mood, defines the shape of your product, and can make or break an image.
Natural Lighting
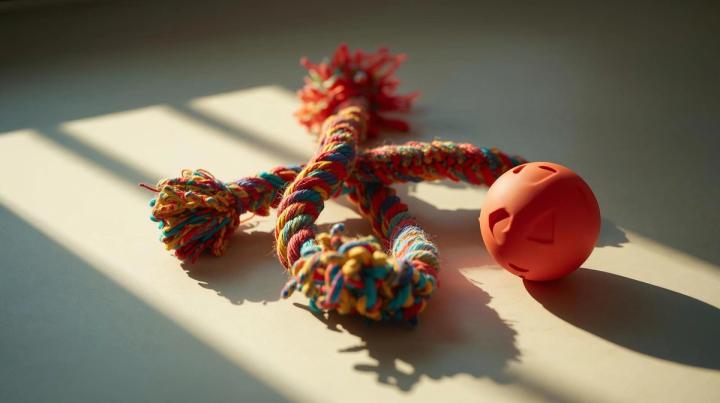
Natural light is a fantastic, cost-effective option. Position your setup near a large window to get soft, diffused light. Avoid direct sunlight, which can create harsh shadows. Use a reflector to bounce light back onto your product and fill in any dark areas. A simple white foam board can serve as an effective reflector. The goal is to create soft, even light that wraps around your product, highlighting its features without creating distracting shadows. Experiment with the placement of the reflector to see how it affects the light and shadows on your product.
Artificial Lighting
For more control and consistency, an artificial lighting setup is ideal. A basic two-light setup with softboxes will provide even, diffused light, mimicking the softness of natural light. For a more advanced setup, a three-point lighting system (key light, fill light, and backlight) will make your products pop. The key light is the main light source, providing the majority of the illumination. The fill light is a softer light that fills in the shadows created by the key light. The backlight is placed behind the product to create separation from the background and add a sense of depth. This classic lighting setup is a versatile and effective way to create professional-looking product photos.
Common Lighting Mistakes to Avoid
- Harsh Shadows: Caused by direct, hard light. Use diffusers or softboxes to soften the light.
- Inconsistent Lighting: When shooting on different days, the natural light will vary. Use a consistent artificial lighting setup to avoid this.
- Mixed Lighting: Avoid mixing different types of light (e.g., natural light and incandescent bulbs) as it can lead to strange color casts.
Backgrounds and Props: Setting the Scene
The right background and props can elevate your product photos from simple snapshots to compelling lifestyle images. For a more scalable solution, consider using an AI-powered background generator to create an endless variety of scenes.
- Seamless Paper: Provides a clean, professional, and non-distracting background. White is a classic choice, but don’t be afraid to use colors that align with your brand.
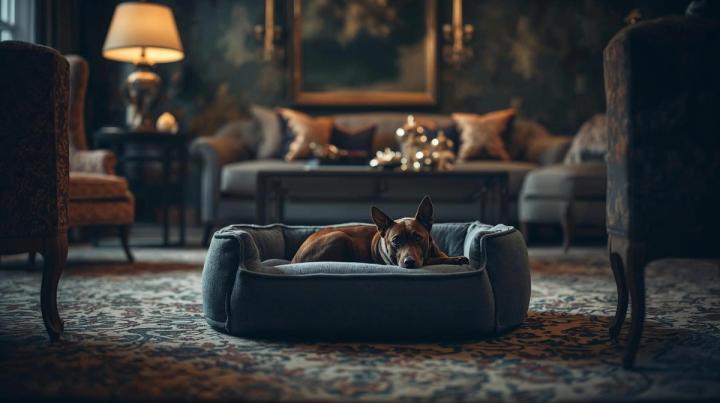
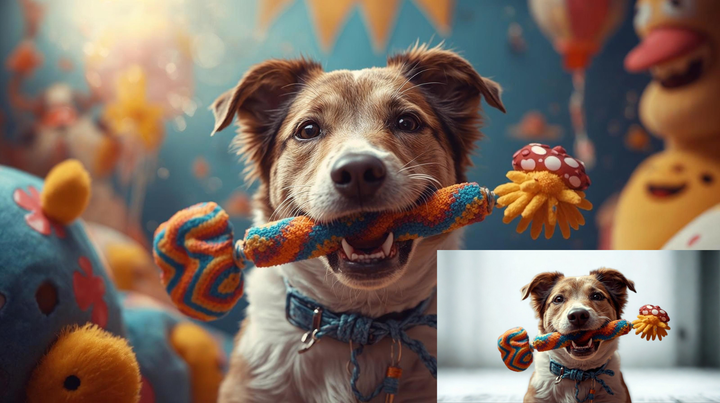
- Lifestyle Backgrounds: Show your product in a real-world setting, such as a cozy living room or a sunny park. This helps customers visualize the product in their own lives. A lifestyle photo showing a dog playing with a new toy in a park is far more engaging than a simple photo of the toy on a white background. These types of images create an aspirational quality, allowing customers to imagine their own pets enjoying the product.
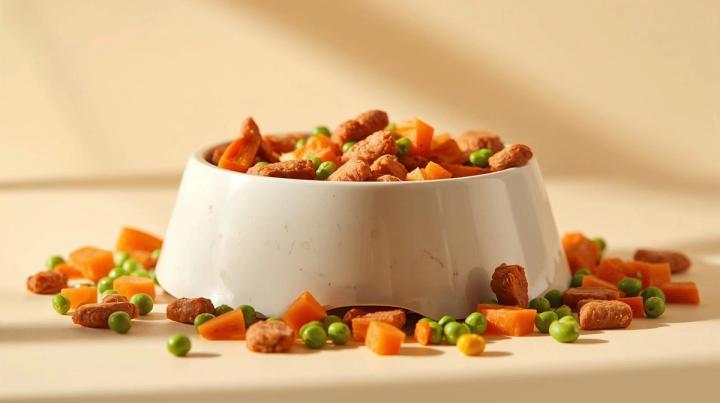
- Props: Use props to add context and scale. For example, a dog leash could be photographed with a collar and a dog bowl.
Composition and Styling Tips
How you arrange your products and props within the frame is crucial for creating a visually appealing image.
- Rule of Thirds: Place your product off-center at one of the intersecting points of a 3x3 grid. This creates a more dynamic and interesting composition. The rule of thirds is a fundamental principle of composition that can instantly improve your photos. By placing your subject at the intersection of the grid lines, you create a sense of balance and visual interest that is more pleasing to the eye than a centered subject.
- Leading Lines: Use lines within the image to draw the viewer’s eye to the product.
- Negative Space: Don’t be afraid to leave empty space around your product. This can help it stand out and create a more minimalist, high-end feel.
Camera Settings for Crisp and Clear Images
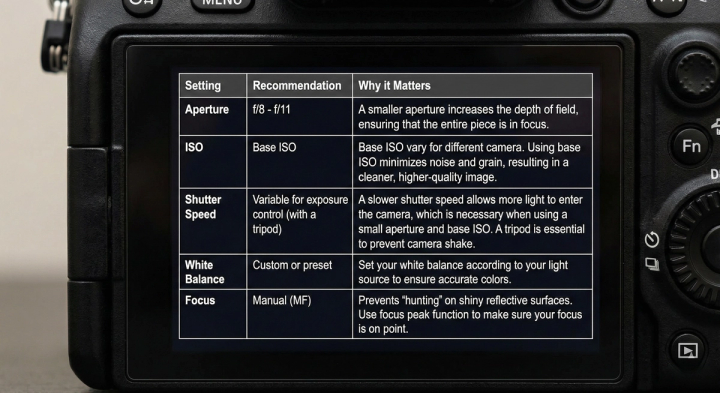
Understanding your camera settings is key to capturing professional-quality photos. Here are some recommended settings for pet product photography:
Overcoming Common Pet Product Photography Challenges
Photographing pet products, especially with live animals, comes with its own set of challenges. Scaling your photography efforts can be a significant hurdle, but it’s a solvable problem with the right approach, including leveraging AI for product visuals.
- Working with Pets: Be patient and have plenty of treats and toys on hand. A tired pet is often a more cooperative model. It’s also important to create a safe and comfortable environment for the animal. Use positive reinforcement and take frequent breaks. If the pet is not cooperating, don’t force it. A stressed or unhappy animal will not make for a good photo.
- Reflective Surfaces: Products like metal bowls or shiny toys can cause distracting reflections. Use a polarizing filter or adjust your lighting to minimize them.
- Getting the Right Scale: It can be difficult to show the size of a product. Including a familiar object (or a pet) in the photo can help provide a sense of scale.
Post-Production and Editing Workflow
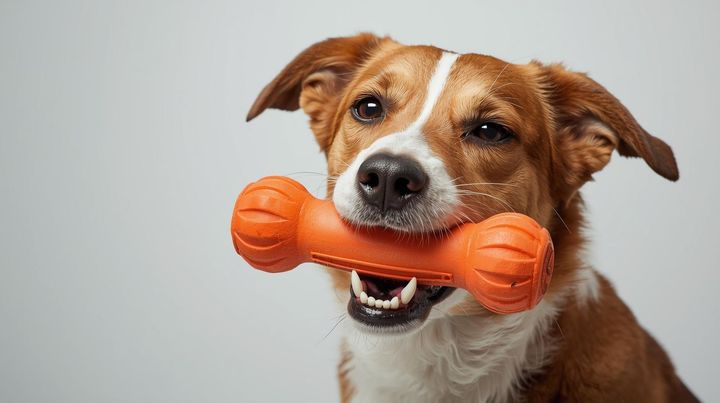
Editing is where you can truly make your images shine. The goal is to enhance the photo, not to drastically alter it. For brands looking to streamline this process, AI tools like Pikes AI can automate much of the editing work, saving you time and resources. These tools can handle tasks such as background removal, color correction, and even generating new backgrounds, freeing you up to focus on the creative aspects of your business.
- Culling: Go through your photos and select the best ones.
- Basic Adjustments: Correct the white balance, exposure, and contrast.
- Retouching: Remove any dust, scratches, or blemishes from the product and background.
- Color Correction: Ensure the colors of your product are accurate.
- Sharpening: Apply a final sharpening to make the details pop.
- Exporting: Save your images in the correct format and size for your e-commerce platform.
Platform-Specific Requirements
Different e-commerce platforms have different image requirements. It’s crucial to optimize your images for each platform to ensure they look their best.
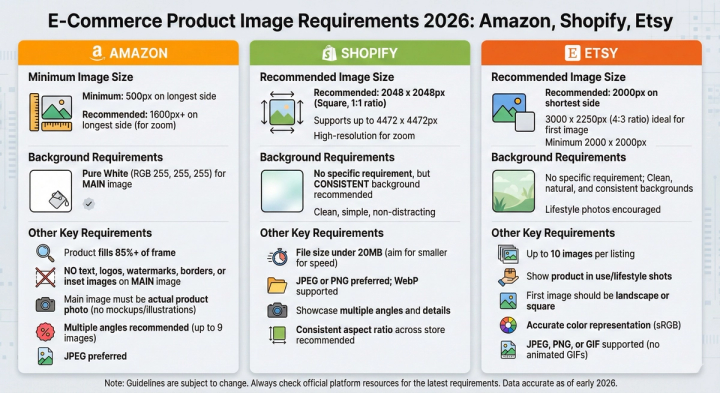
For more detailed information, always refer to the official seller guidelines for each platform, such as Amazon Seller Central.
How AI is Transforming Pet Product Photography
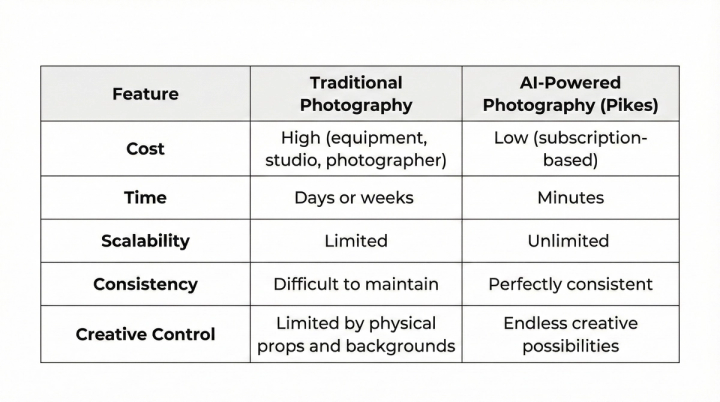
The rise of AI is revolutionizing the world of product photography. AI-powered platforms like Pikes AI offer a powerful alternative to traditional photography, enabling brands to create stunning, customized product visuals at scale. This technology allows you to generate an infinite variety of images, testing different backgrounds, props, and lighting conditions without the need for a physical photoshoot. This not only saves a significant amount of time and money but also opens up new creative possibilities that were previously unimaginable. This is a significant shift from other tools like Kive, which may have different focuses.
Conclusion
High-quality pet product photography is a critical component of a successful e-commerce strategy. By investing in the right equipment, mastering lighting and composition, and understanding the nuances of post-production, you can create images that capture the hearts of pet owners and drive sales. Whether you choose the traditional route or embrace the future with AI, the power to create stunning visuals is in your hands. And for those looking to streamline the process and achieve professional results with unparalleled efficiency, AI-powered solutions like Pikes AI offer a compelling path forward.
FAQ
1. What is the best camera for pet product photography?
While a professional DSLR or mirrorless camera will give you the best results, you can still take great photos with a recent smartphone. The key is to understand the principles of lighting and composition.
2. How can I make my pet product photos look more professional?
Use a clean, uncluttered background, soft and even lighting, and a tripod to keep your camera steady. Pay attention to composition and styling to create a visually appealing image.
3. Do I need a live pet model for my photos?
While a live pet can help show your product in action and create an emotional connection, it’s not always necessary. You can create beautiful product-focused shots without a live model.
4. How much should I budget for pet product photography?
Your budget can range from under $100 for a basic DIY setup to several thousand dollars for professional equipment. Alternatively, AI photography services offer a cost-effective subscription model.
5. How is AI changing pet product photography?
AI platforms can generate photorealistic images of your products in any setting imaginable, without the need for a physical photoshoot. This saves time, reduces costs, and allows for unlimited creative possibilities.

Written by
Mike Lehman
Mike Lehman is a senior content strategist at Pikes. Before joining Pikes, Mike spent nearly a decade working with Glossier, Haus, and Athletic Brewing, leading campaigns that blended storytelling and data.