
Pontus Karlsson
AI Video Ads for Beverage Brands: What Moves Well, and What Falls Apart
To create AI video ads for a beverage brand, start with a clear photo of the actual bottle or can, brief one motion per shot, then review the generated clip before editing it into an ad. Keep the label readable and compare the liquid, glass and packaging with the real product. Use filmed footage when the generated version cannot meet that standard.
This guide covers five beverage shot ideas, a sample 12-second storyboard and a workflow for creating assets in Pikes. The storyboard is an illustrative production plan, not a tested campaign or a promise of ad performance.
What kind of motion actually sells a drink?
Five useful shots to consider when planning a beverage ad:
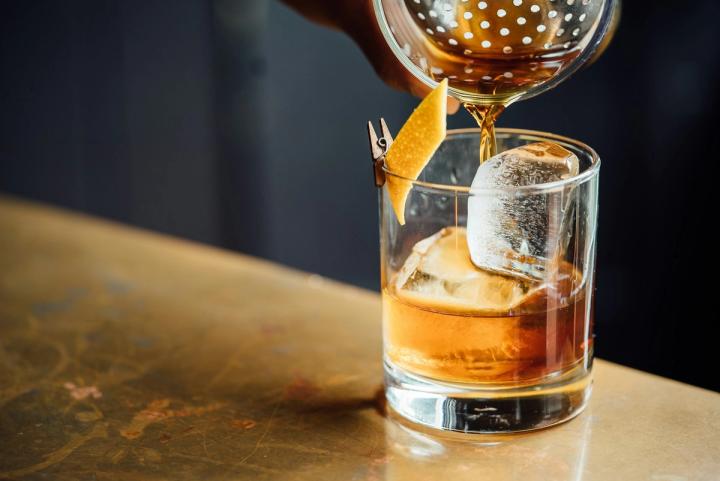
The pour. Liquid entering a glass, often over ice. Brief the stream direction, glass position and liquid level, then check that the stream connects with the vessel and the fill level changes plausibly. A simple brief reduces the moving parts you need to review; it does not guarantee a convincing pour.
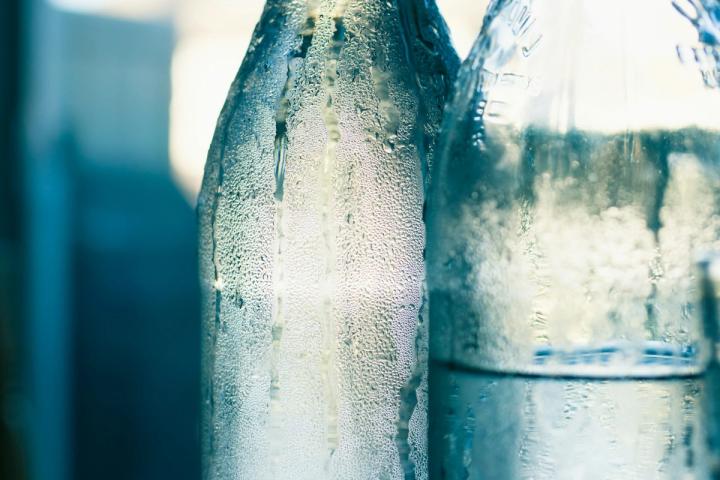
The condensation crawl. A slow push on a cold can or bottle while droplets form and run. Use it to convey a chilled serving scene, and check that the droplets stay on the container surface.
The carbonation rise. Bubbles travelling up through liquid. Check their motion and consistency across the clip; use filmed macro footage if realistic carbonation is essential to the shot.
The hero rotate. The container turning slowly to show its packaging. Review the label as it moves through the frame, and use filmed footage when the full turn needs to be exact.
The interaction. A hand lifting the can, a cap coming off or a sip. Plan these around the action you want to show and inspect how the person and product make contact.
If you are building a beverage ad from existing product stills, plan against that list rather than against a mood board. Our beverage photography guide covers the still-image craft these shots are built on; this is what happens when you ask them to move.
Why do AI-generated beverage videos fall apart?
Review these four potential failure modes before choosing a clip:
Label warp on rotation. A model can invent parts of the label that are not visible in the reference. Check small text, volume marks and the logo throughout the clip, especially when the container turns. Our product label text guide explains the still-image review that should come before animation.
Carbonation that reads as noise. Check whether bubbles move through the drink plausibly or appear as a floating texture. Review the clip on a phone as well as at full size. If the fizz distracts from the product, replace that shot with filmed footage or a simpler composition.
Ice that changes between frames. Watch for cubes changing shape and for inconsistent reflections or refraction through the glass. Our glass and reflective product photography guide covers the reference-image problems that can carry into animation.
Hands and mouths. A lift, opening or sip adds interactions between the product and a person. Inspect the grip, contact points and package shape throughout. Film the action if generated attempts do not meet your quality bar.
How long should a beverage ad clip be?
Use the shortest accepted segment that communicates the shot’s purpose.
Available clip lengths, audio options and aspect ratios depend on the model selected. Check the current generation controls before briefing a shot, and plan to trim the accepted footage in your editor.
As a starting edit plan, give each shot two to four seconds and cut when its purpose is clear. This is an editorial suggestion, not a universal generation limit. Inspect the entire accepted segment: a clean first frame does not prove the rest of the clip is usable.
Build the edit from separately reviewed shots. That lets you replace a weak segment without regenerating the whole sequence.
Choose the canvas for the destination placement before generating. Keep the product and copy away from interface overlays and confirm the current requirements in the publishing tool. Our product photos to video ads guide covers planning the edit.
For retail media, consult the separate Amazon shoppable video requirements guide.
What breaks first: a can or a bottle?
They fail differently, and it changes what you brief.
For cans, watch the printed wrap and the highlight down the side. Try a stationary can with a gentle camera move before attempting a full turn, and check that the label stays attached to the same surface.
For glass bottles, check the label as well as the liquid level, neck shape and background seen through the glass. Small camera movements still need a review for distortion.
Cartons and pouches introduce different checks: inspect flat-panel graphics, corners, folds and seams. Choose the SKU with your clearest reference image for the first test instead of assuming one packaging type always generates best.
A useful starting constraint is to keep the container still and move the camera gently. Add more complex product motion only when the simpler version passes review.
How do you brief a beverage shot so it holds up?
Be specific about physics, not about mood.
A brief such as "refreshing summer vibe" leaves the motion unspecified. Add the direction, speed, light and product constraints so each attempt has a clear objective:
- Name one motion. "Slow vertical camera push, product static" beats "dynamic energy."
- Fix the light. Say where the key is and that it stays there. Highlights that wander are the fastest give-away on a can.
- State what should remain fixed: the label, logo, packaging shape and liquid level. Treat these as instructions to check against, not guarantees the model will obey.
- Cap the duration. Ask for the shortest clip that carries the idea.
- Use an end frame if the selected model supports one. It adds a target for the ending, but intermediate frames can still distort.
Then test it. Play the clip at its intended display size and inspect frames around every movement or edit. Compare the visible branding with your reference. Reject a segment if the product changes identity, the logo distorts or the motion becomes implausible.
Pikes uses your product references and brand context to guide image and video generation. See beverage product photos and ad creatives for examples, then use the workflow below to plan your own assets.
A 12-second beverage ad storyboard
Example brief: introduce a canned sparkling drink to people who have not seen the brand. Use three four-second segments below as a starting edit plan. Adjust timing to your footage and message; these timings are not a tested recipe for higher conversions.
- 0–4 seconds — Product introduction. Show the actual can front-on in a simple serving scene. Try a gentle camera push with the product stationary. Check that the name and packaging match the reference.
- 4–8 seconds — Serving moment. Cut to a glass beside the can, or use an approved filmed pour. Keep the liquid color and serving size consistent with the product. Do not use a generated pour that changes the container or behaves implausibly.
- 8–12 seconds — Clear next step. End on an approved packshot and add your offer and call to action in the video editor. Typeset the copy in the edit so it remains readable; do not rely on generated packaging text to carry the offer.
Example prompt for the opening shot
Use the attached photo of our actual can as the product reference. Create a gentle camera push toward the stationary can on a light stone tabletop, with soft side lighting and a glass beside it. Keep the can front-facing. Preserve the visible label, logo and package shape. Leave space for copy to be added later. No rotation, hands or pouring in this shot.
This is an illustrative prompt to adapt to your reference and selected model. Review the output against the brief; the instructions do not guarantee exact product fidelity.
Create the beverage assets in Pikes
Start with your real SKU photo and brand guidance. Brief one shot at a time, including the scene, intended placement and product constraints.
Generate image or video variations and compare the results with your reference. Keep approved segments; revise or regenerate failures, allowing for the additional credit cost.
Export the selected assets, assemble the storyboard in your editor and add your approved copy and audio. Complete targeting, budget and campaign publication in your ad platform.
The Pikes product workflow explains the reference, review and export steps.
For creative variations intended for Meta campaigns, see Meta ad creatives.
Plan one creative comparison
For your first comparison, change the opening scene while keeping the SKU, offer and final call to action consistent. Name each variant so you can connect it with its results. Judge it against your campaign objective after delivery; an attractive generated clip is not evidence of more sales.
Storyboard and workflow updated September 14, 2026.
What should you still film?
Start by testing a camera move around a stationary product or a simple change in the surrounding scene. Decide whether to use the output by reviewing the result, rather than assuming a type of shot will always work.
Film the action when it needs an exact physical performance: a specific pour, a person opening the product, a full packaging turn or a close-up of carbonation. Build a library of approved footage and use generated scenes where they pass the same product and visual checks.
A filmed hero plus generated variants is a more useful plan than committing entirely to either one.
Frequently asked questions
Can AI generate a beverage video from a single product photo? Yes. A clear still can be the starting frame for an image-to-video workflow. Begin with a simple camera move, then inspect product details throughout. One reference does not guarantee accurate unseen angles or interactions.
How long should an AI-generated beverage clip be? Use the duration supported by your selected model and trim to the portion that works. The example in this guide uses three four-second segments for a 12-second edit; it is a planning example, not a performance benchmark.
Why does my can’s label change during the video? Generated motion can alter packaging details, particularly when the label turns away from the reference view. Reduce rotation, start from a clear reference and inspect the full clip. A prompt or end frame cannot guarantee exact label text.
Does AI video work for carbonated drinks? It can be used in a beverage workflow, but inspect bubbles, liquid and glass carefully. If realistic macro fizz is central to the message and generation does not reproduce it convincingly, film that shot.
What aspect ratio should a beverage video ad be? Match the placement you will publish to. Check current dimensions and interface overlays in the ad platform, then choose a supported generation format and preview the final edit there.
Should sound be part of the plan? Plan it during the edit. Where the selected model supports generated audio, review it alongside the image. Use cleared audio or your own recording, and make sure the product and message remain understandable with sound off.
Turn your product photos into ad concepts
Create image and video variations from your product references in Pikes, then review the assets for your campaign.
AI ad creatives with PikesCompare plans and generation credits