

Mike Lehman
How to Photograph Glass and Reflective Packaging
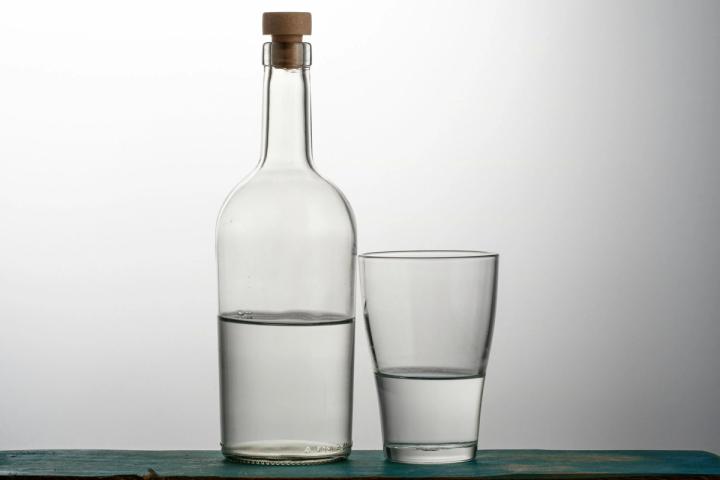
Glass and metal mirror their surroundings, so you light the surroundings and control what the product reflects. Every difficult reflective product (clear bottles, amber vials, foil pouches, metallic tins) comes down to that one shift, and to two setups: bright-field, where a lit background renders the product's edges dark, and dark-field, where a dark background renders them bright.
Get those two right and most of the fight is over. Below is how each is built, what to do about label glare, and the marketplace requirement that quietly rules one of them out for your main image.
Why does reflective packaging break normal product lighting?
A matte carton scatters light in every direction, so it looks roughly the same wherever you put the source. Glass and metal do the opposite. They act like mirrors, which means the camera does not see your light. It sees whatever your light is bouncing off.
The practical consequence: on a reflective surface, moving the light barely matters. What matters is what sits in the reflection. A softbox two feet from a bottle shows up as a bright rectangle on the glass. So does your tripod, your hands, and the untidy corner of the room behind you.
So the job stops being "where do I put the light" and becomes "what do I want reflected in this surface, and how do I make that thing big enough to cover it."
That is why reflective work is slower than it looks, and why a shot that took ten minutes on a cardboard box takes an hour on a serum bottle.
What is bright-field lighting, and when should you use it?
Bright-field means the product stands in front of a brightly lit background, and you let the glass go dark at its edges.
Build it like this:
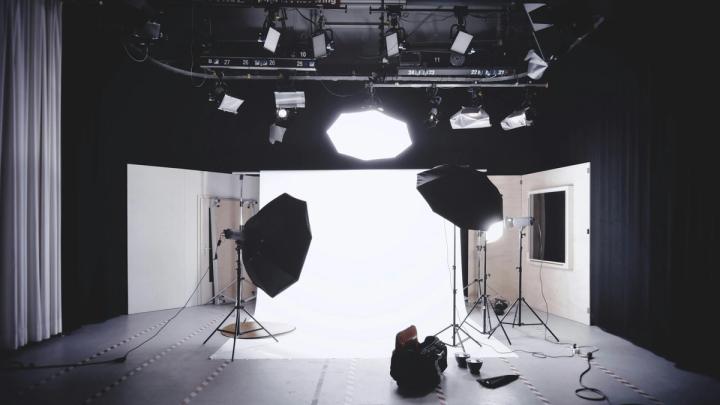
- Put a translucent white surface behind the product: a diffusion panel, a sheet of acrylic, or a white seamless.
- Light the background, not the product. One source behind or aimed at the panel.
- Pull the product forward, at least two to three feet off that background, so the light falling on it stays under control.
- Add black cards, called flags, just outside the frame on both sides of the product.
Those black cards are the whole trick. The glass reflects them, and those dark reflections become the crisp outlines that define the bottle's shape against a white field. Without them a clear bottle on a white background dissolves into the background and reads as a vague smudge.
Bright-field is the right default for clear glass, and it is the setup that lands closest to what marketplaces want.
What is dark-field lighting, and when is it better?
Dark-field inverts it. The background goes black and the product's edges glow bright.
Put the product against black, then place strip lights or white cards to the sides and slightly behind, angled so the product picks up their reflection along its edges. The result is a bright rim tracing the outline, with a dark centre.
This is the better choice for:
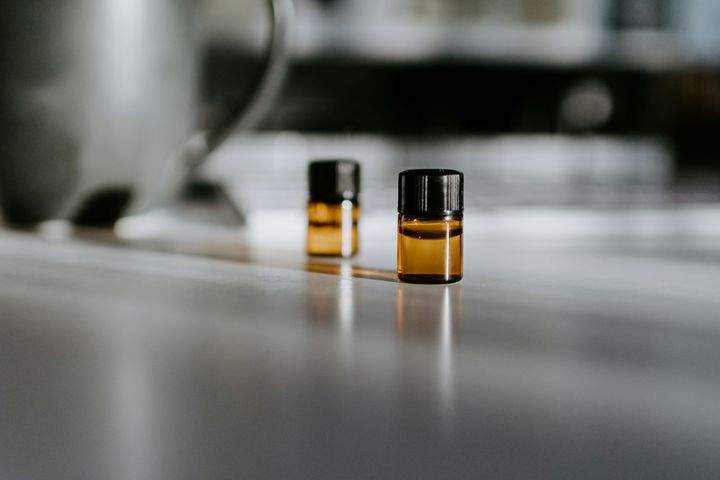
- Amber and tinted glass, where a white background washes the color out. Against black, the amber holds its depth.
- Spirits, oils and serums where you want the liquid to look rich rather than clinical.
- Anything textured in metal, such as embossing, knurled caps and brushed finishes, which reads better with a directional highlight than with flat, even light.
The catch is compliance, which we get to below.
How do you kill glare on a glossy label?
Glossy and foil-stamped labels are their own problem, because the label is often the only part of the shot that legally has to be readable.
Three fixes, in the order to try them:
Make the source bigger and closer. A large diffused source produces a broad, gentle falloff across the label instead of a hard hotspot. A 5-inch speedlight at three feet is a glare machine; a 4-foot softbox at the same distance is not.
Change the angle, not the light. Reflections obey the angle of incidence. Rotate the bottle a few degrees, or raise the camera slightly, and the hotspot slides off the label without touching a single light.
Cross-polarise. A polarising filter on the lens plus polarising gel on the light, rotated 90 degrees apart, removes specular reflection almost completely. It costs you roughly one to two stops of light and it will also flatten the sparkle on glass, so use it on the label pass and not necessarily on the hero.
One caution on the third option: killing all reflection makes glass look like plastic. Reflections are what tell a viewer a surface is glass, so control them rather than removing them.
What camera settings does reflective work need?
Nothing exotic, but three things are non-negotiable.
A tripod. You are going to shoot the same frame repeatedly while moving cards around. Handheld makes the comparisons useless.
A small aperture, around f/11 to f/16. Bottles are deep, and a shallow depth of field puts the label edge out of focus. If one aperture cannot hold the whole product sharp, shoot a focus stack and merge it.
Base ISO and a clean surface. Reflective products show every fingerprint and dust speck, and every one of those is a retouching minute later. Cotton gloves and a blower cost less than the cleanup.
Color is the other thing that drifts on tinted glass and metallics. If the amber in your bottle is a brand asset, shoot a color target and correct against it rather than eyeballing. We covered why product photo color accuracy matters and how far off a screen preview usually is.
Will a dark-field shot pass Amazon's requirements?
Not as your main image, and this catches people out after the shoot rather than before it.
Amazon's Product image guide, checked on 16 August 2026, requires the main image to "have a pure white background (RGB color values: 255, 255, 255)." It also asks that the product fill "85% of the image," and that the photo "accurately represent the real scale, quantity, and color of the product." The technical specs allow 500 to 10,000 pixels on the longest side, with JPEG recommended.
A beautiful dark-field bottle fails the first of those outright. So plan the shoot around it:
- Bright-field for the main image. It is already close to pure white, and the black-card edges survive the background clean-up.
- Dark-field for secondary gallery slots, ads and social. No white-background rule applies there, so that is where the dramatic version earns its keep.
Shooting both in the same session costs far less than rebuilding the set a week later. If you are working out how many frames each SKU actually needs, we broke that down in how many product photos per SKU.
Where does AI fit into reflective product photography?
AI earns its place on the background and the scene. The reflection itself still has to be photographed, or it drifts.
AI generation is good at putting a product into a lifestyle setting, producing seasonal variants, and creating the volume of ad creative a paid-social calendar eats. It is much less good at inventing plausible reflections on a surface it has never seen, which is why reflective packaging is the hardest category for image models. Glass is where drift shows up first: labels warp, embossing goes soft, and the amber shifts a few points off brand.
That fidelity gap is the reason we built Pikes AI to generate from a brand's actual SKUs rather than from a text description of them, because on glass a description is not enough information to get the label right.
Whatever tool you use, apply the same check. Open the output at 100% zoom and read the smallest text on the label. If it is warped, invented, or subtly the wrong color, the image is not usable on a product detail page no matter how good the scene looks at thumbnail size. That test is tool-agnostic and it takes ten seconds.
For categories where the packaging is less reflective, the workflow is more forgiving. Our guides to cleaning product photography and men's grooming product photography cover those. For drinks specifically, the beverage photography guide goes deeper on condensation, pours and ice.
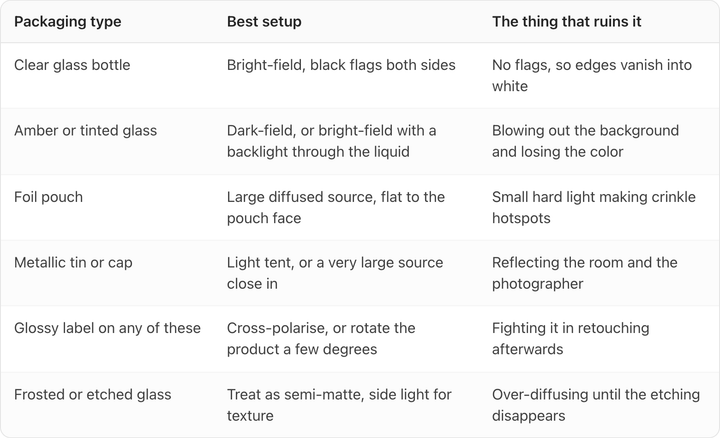
Which setup for which surface?
| Packaging type | Best setup | The thing that ruins it |
|---|---|---|
| Clear glass bottle | Bright-field, black flags both sides | No flags, so edges vanish into white |
| Amber or tinted glass | Dark-field, or bright-field with a backlight through the liquid | Blowing out the background and losing the color |
| Foil pouch | Large diffused source, flat to the pouch face | Small hard light making crinkle hotspots |
| Metallic tin or cap | Light tent, or a very large source close in | Reflecting the room and the photographer |
| Glossy label on any of these | Cross-polarise, or rotate the product a few degrees | Fighting it in retouching afterwards |
| Frosted or etched glass | Treat as semi-matte, side light for texture | Over-diffusing until the etching disappears |
FAQ
What background should I use for clear glass? A lit white translucent panel for a marketplace main image, with black cards at the sides to define the edges. Use black only for secondary images, because Amazon requires a pure white main image.
Why does my glass bottle look grey and flat? Almost always missing edge definition. On a white background, clear glass needs dark reflections at its sides to read as a shape. Add black cards just outside the frame.
Do I need a polarising filter for product photography? Not for matte packaging. For glossy labels, foil and chrome it is the fastest fix available, at a cost of roughly one to two stops of light. Try repositioning first, since it is free.
How do I stop reflections of the camera and photographer? Shoot through a hole cut in a white card, or build a light tent around the product with a gap for the lens. On highly curved metallic surfaces this is the only reliable answer.
What aperture is best for bottles? f/11 to f/16 covers most bottle depths at normal working distances. If the front label and the back edge cannot both be sharp, focus stack rather than stopping down further and losing sharpness to diffraction.
Can AI generate glass product photos that pass marketplace review? For lifestyle and ad use, often yes. For a main product image, check the label text at 100% zoom first, because reflective packaging is where generated detail drifts most, and marketplaces require the image to accurately represent the product.
Start with the two setups
Most reflective-packaging problems are one of two failures: no edge definition on a white background, or a hard small light on a glossy surface. Bright-field with black flags fixes the first. A bigger, softer, closer source fixes the second.
Build both setups once, photograph your hardest SKU in each, and keep the frames as a reference for the next shoot. If your problem is that you have more SKUs than shoot days, see what Pikes AI can generate from the product images you already have, and run the 100% zoom test on the result before it goes anywhere near a listing.
Create your next product image set
Use your product photos and brand context to create studio-style and lifestyle variations in Pikes.
AI product photography with PikesCompare plans and generation credits

Written by
Mike Lehman
Mike Lehman is a senior content strategist at Pikes. Before joining Pikes, Mike spent nearly a decade working with Glossier, Haus, and Athletic Brewing, leading campaigns that blended storytelling and data.